Drawing a character involves understanding the proportions of the human body. Without proper proportions, our drawings may appear unrealistic and lack credibility.
Even if we aim for a style of drawing that is not realistic, such as manga or children’s illustration, mastering proportions is essential. Once we understand the rules, we can better bend and reinterpret them.
Here, we will explore methods to better understand how to draw the human body with proper proportions. And for that, you don’t need to be an expert in anatomy!
Discover our free guide to start drawing easily. You will learn practical methods and exercises to put into practice right away.
1 - Anatomical canons
An anatomical canon refers to an ideal model that can be followed. It represents the “perfect” proportions of the human body in drawing.
These canons are usually measured using the head as a reference. In fact, the head is defined as a full unit of measurement. This can make it easier for us to measure the different parts of the body.
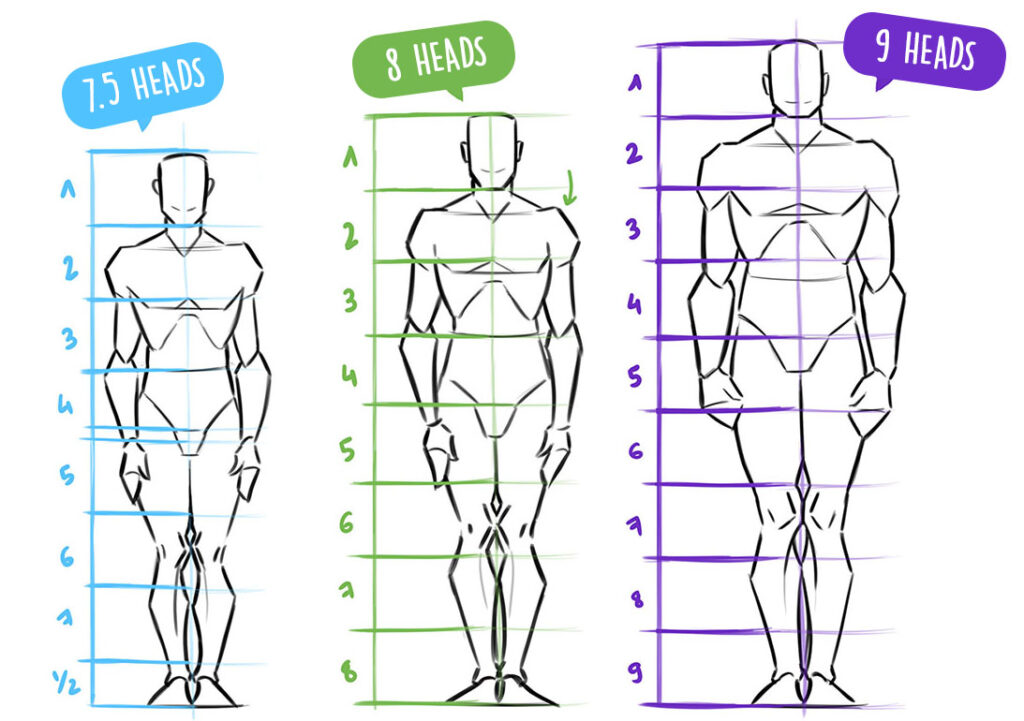
The three most common canons:
1
The standard human figure would measure approximately 7.5 heads in height. These proportions are the most accurate if one wants to be closest to reality. However, there are simpler models available to make things easier for us.
2
Since the Renaissance, the “idealized” canon of the human body corresponds to a total of 8 heads in height. Leonardo da Vinci’s Vitruvian Man is a perfect example of this. It results in a rather athletic body with seemingly perfect proportions. The number 8 is easy to apply, which is why most artists turn to this canon.
3
We can also extend the measurements to 9 heads to give our character a more heroic look. They will appear much more imposing and muscular.
Of course, proportions can vary slightly from person to person. The 8-heads method gives us a reference point to start with in drawing. We can then play with these rules and adapt our proportions to our characters.
The particular case of children
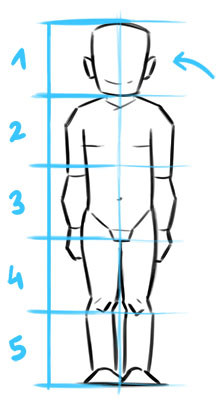
The body part that grows the least over time is the head. Therefore, a child will have completely different proportions compared to an adult. We can apply proportions of 5 heads to a relatively young child.
We can even try proportions of 4 heads for a toddler, and go up to 7 heads for a teenager.
2 - The method for drawing with good proportions
Step 1: Draw a vertical line
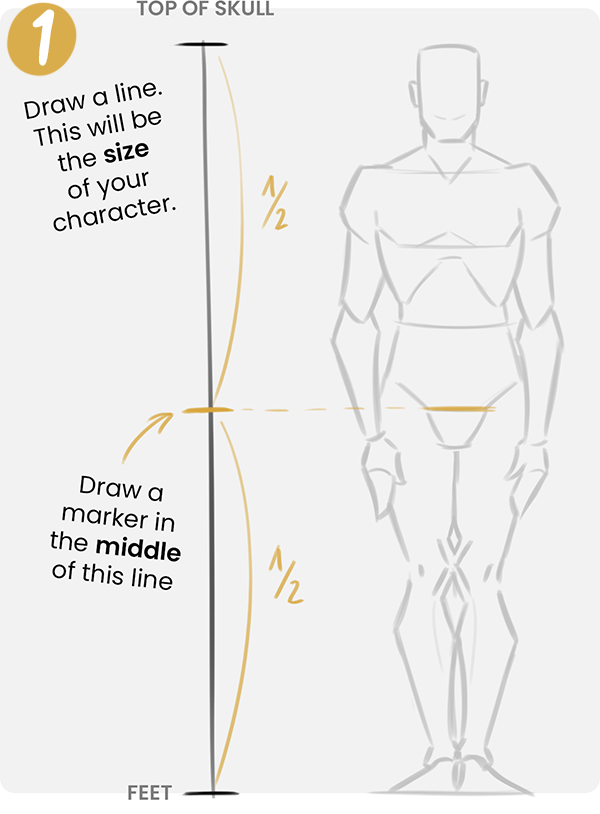
To draw a character with good proportions, we start by drawing a vertical line. It will symbolize the height of our character.
By dividing this line in half, we will obtain the location of the pubis, the crotch of the character.
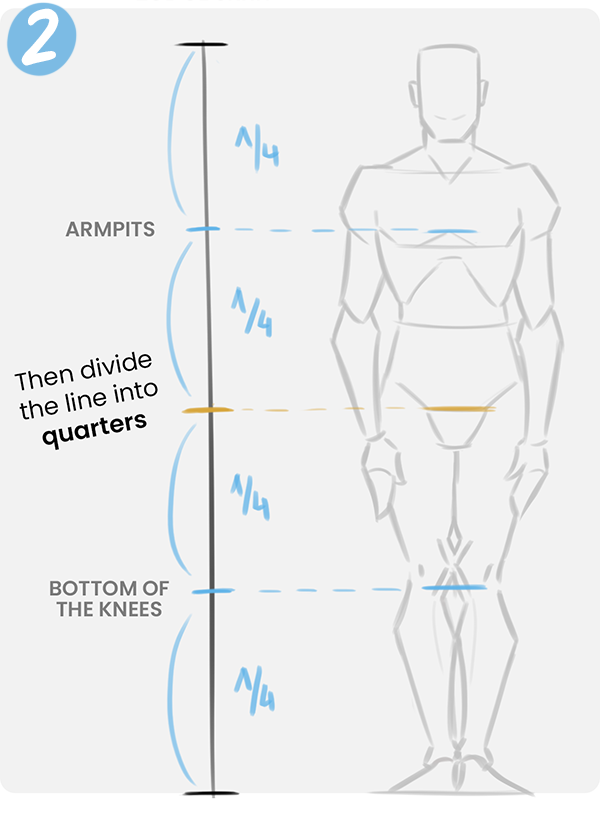
Step 2: Define quarters
By dividing our line into 4 equal parts, we obtain new reference points for the proportions of our character.
The first quarter marks the level of the armpits, the last one marks the bottom of the knee.
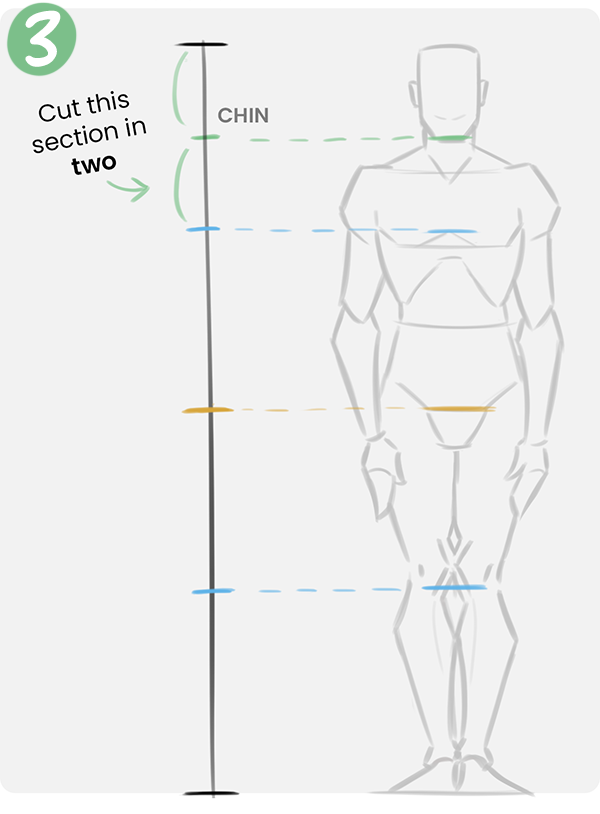
Step 3: Cut the top section into two
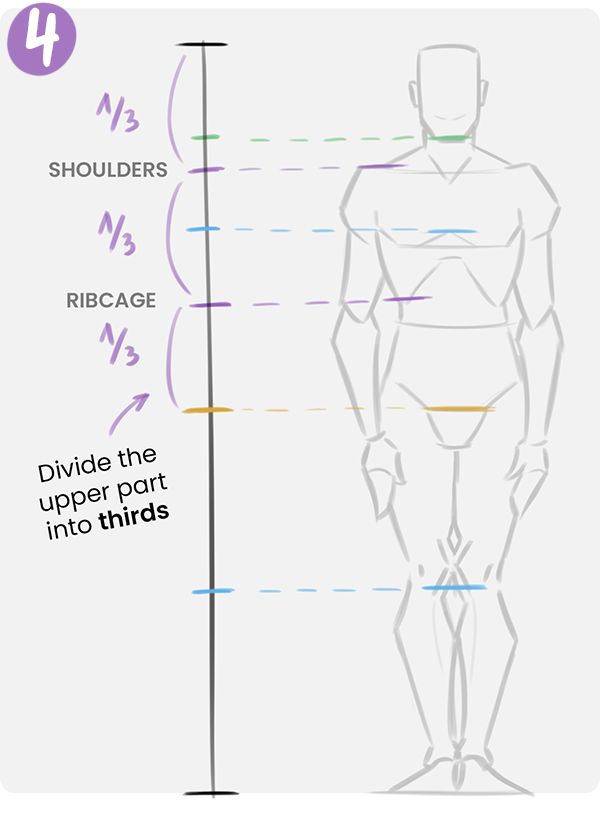
Step 4: Divide the upper part into thirds
Finally, we just need to divide the upper half into thirds to determine the placement of the shoulders and the ribcage.
Now that we have our guidelines, it’s time to learn how to actually draw our character!
To make things easier, always think in terms of thirds or halves. It’s really simple to remember the relationships between the body parts this way. By memorizing this technique, it becomes much easier to position the elements of the body accurately.
3 - Drawing the body using the triangle method
Now that we know how to position the base of our body, we will now proceed to add details in order to draw our character with proper proportions.
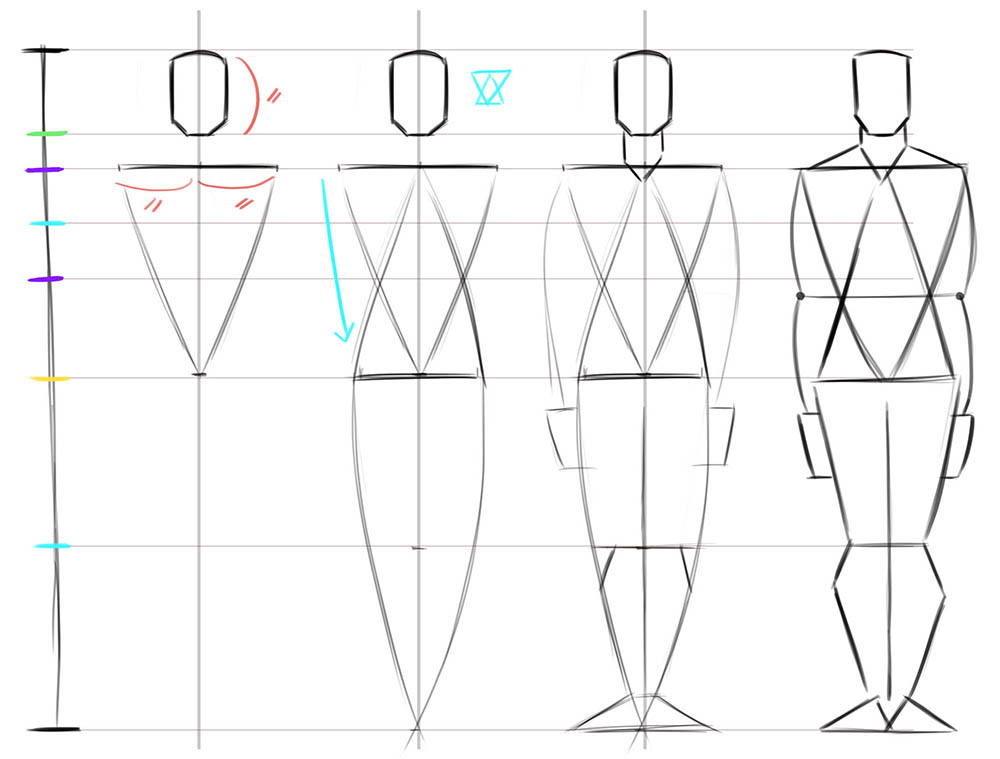
1
Now that we have our guidelines in place, we can start by drawing the head and shoulders. The width of the shoulders is usually about two times the height of the head. Then, we draw a triangle that connects the shoulders to the pelvis.
2
Next, we draw an inverted triangle from the pelvis to the base of the neck. Sometimes, the pelvis is narrower than the shoulders, sometimes, it’s the opposite. Then, we draw a triangle that extends down to the feet.
3
The hands will usually reach mid-thigh. The waist will be located below the bottom of the ribcage, and the elbows will be perfectly aligned. By thinking in simple geometric shapes, it becomes easier to draw the basic structure of the body.
Detailing the male body
Breaking down the male body structure based on our proportions, we can add details and give a more human appearance to our character. There’s no need to overcomplicate things – we’ll only draw simple shapes.
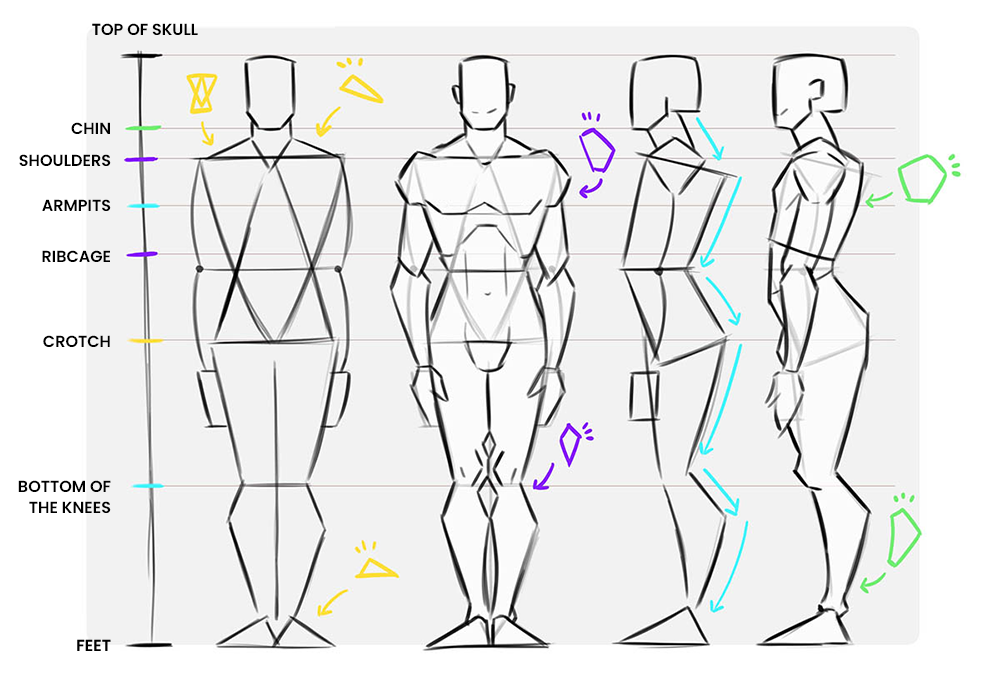
All elements of the body can be simplified into very basic shapes such as triangles, hexagons, squares, etc. By using as few lines as possible, you can create a quick and comprehensive base with proper proportions.
Detailing the female body
The body of a woman follows the same rules as the body of a man. The placements are the same, with only a few ratios changing. For example, the hips will be wider or equal to the width of the shoulders.
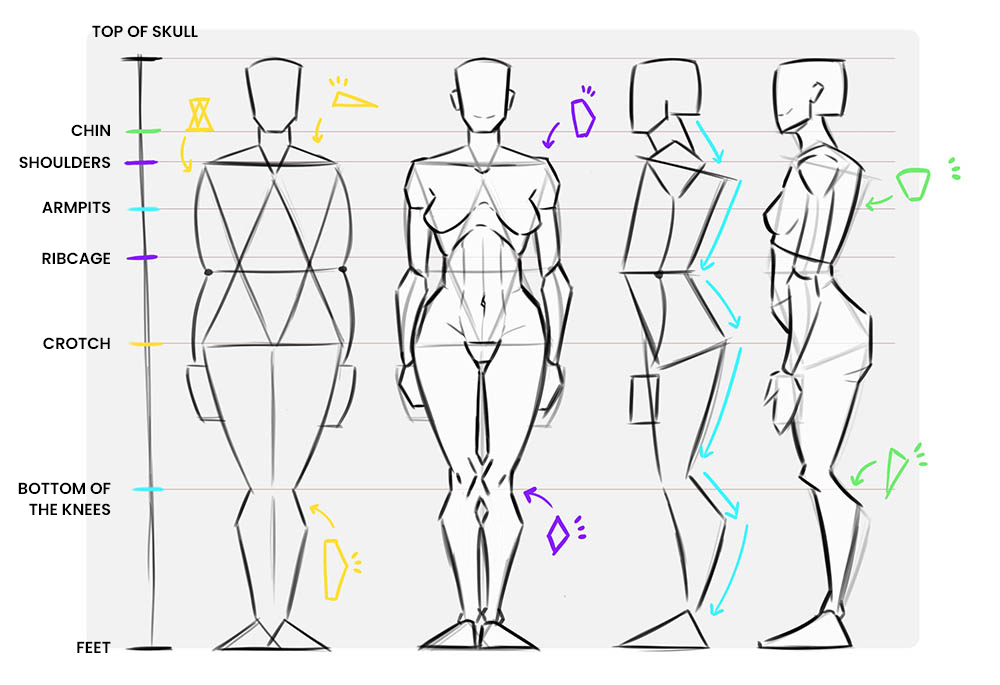
The key is to break down the outlines into simple shapes. The knees can be simplified into three lines. The feet and calves resemble triangles. We stick to the simplest forms possible.
4 - 2D simplified shapes
Once we understand how the different parts of the human body relate to each other, it becomes a matter of shapes. We can play around with them to create unique characters.
If we stick to our example of a front view, we can start by simplifying our shapes and altering them. It’s a simplistic approach, but it allows us to quickly establish our proportions before adding details and anatomy.
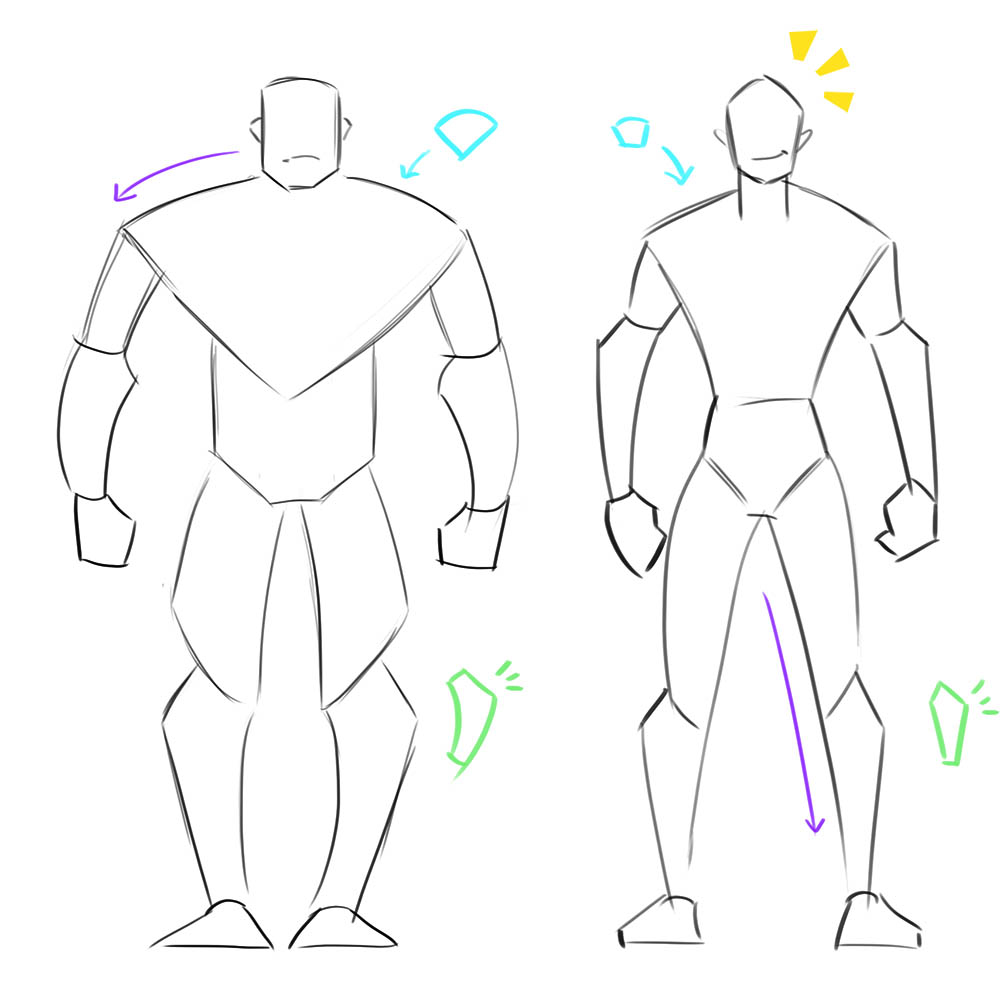
The methods of the 8 heads and triangles work for characters in front or back views. However, as soon as a character is in motion or in more complex poses, we will need to adapt.
The 8-heads canon is a guide that serves as a reference, but it won’t solve all our problems. To achieve that, we need to change our perception and transition from drawing in 2D to drawing in 3D.
5 - Thinking in terms of volume and perspective
We generally want to learn how to draw bodies in motion and dynamic poses. And for that, we need to switch to 3D mode.
Changing the pose of a body does not change its proportions in reality. The proportions appear to change due to perspective. Indeed, a human body moves on a 3D plane and, like any other object, it is subject to perspective.
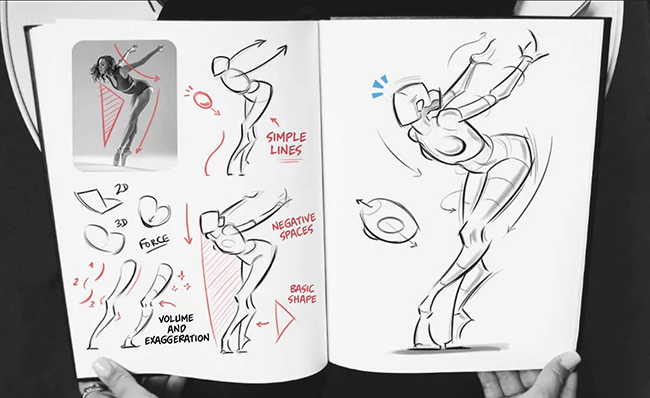
To better understand how to achieve proper proportions on a character with a dynamic pose, we need to study volume.
We transition from a 2D view where we drew squares and triangles to a 3D view where we draw cubes and cylinders.
There are no magical shortcuts for this. The key is to simplify what we see into basic volumes. A human body is highly complex, but by simplifying it, it becomes easier to draw.
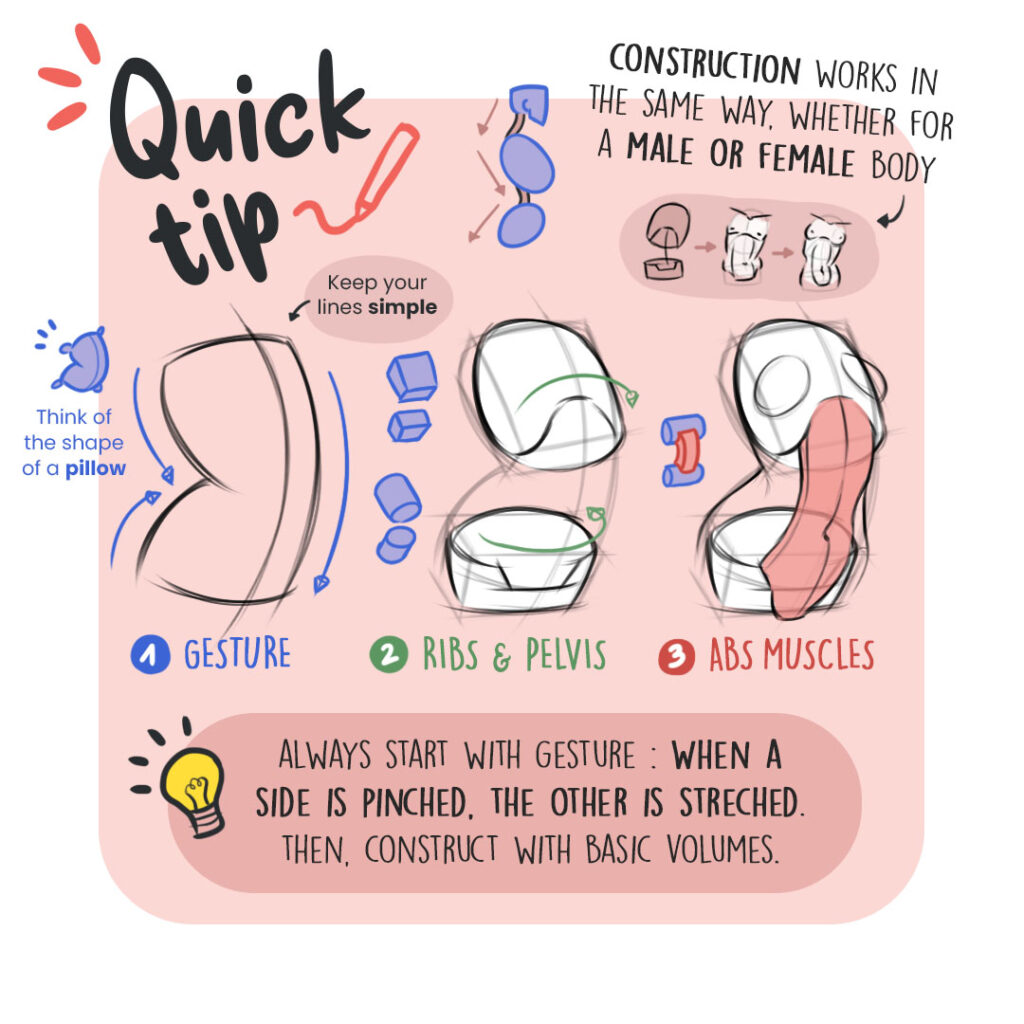
By mastering our sense of drawing in volume, in 3D, we can better position simple shapes in space. It becomes easier to achieve proper proportions when we try to place cylinders rather than muscles.
Constantly questioning
It’s all about ratios and instinct. This develops through practice, a sense of perspective, and constant questioning.
When drawing, it is crucial to constantly question the placement of elements. Is this cylinder too small? Too big? Does it reach the level of the ribcage properly? It is through these inquiries that we can make progress.
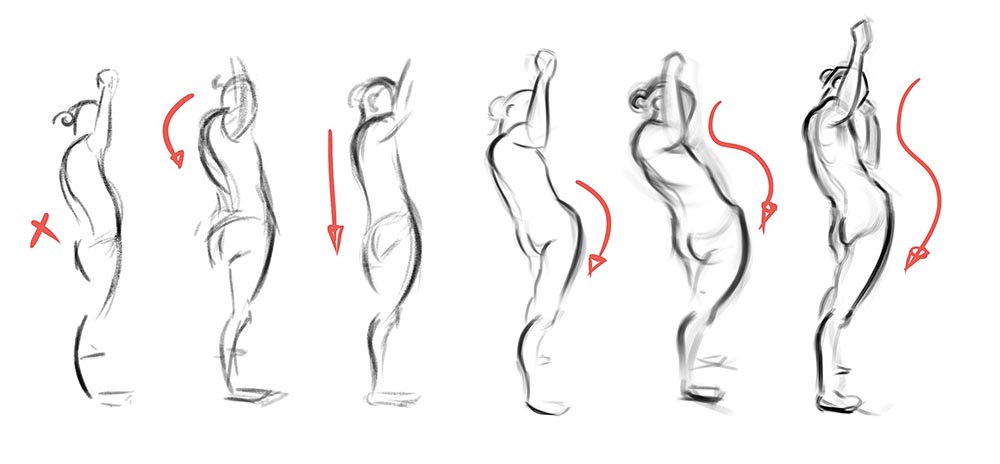
We realize that developing our drawing foundations is essential to be able to draw the human body with good proportions. Learning to draw in volume and perspective can solve many of our problems and help us develop a better instinct.
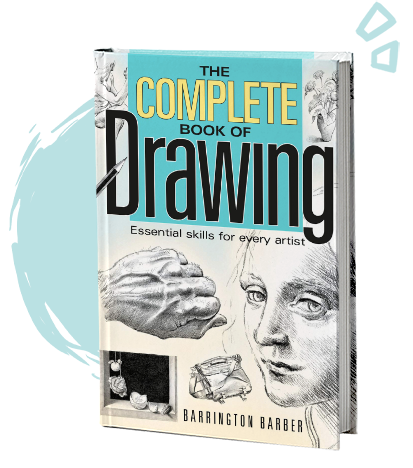
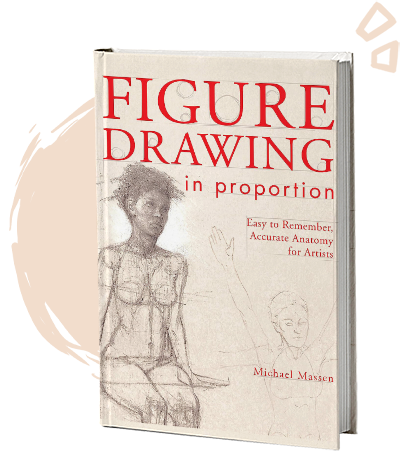
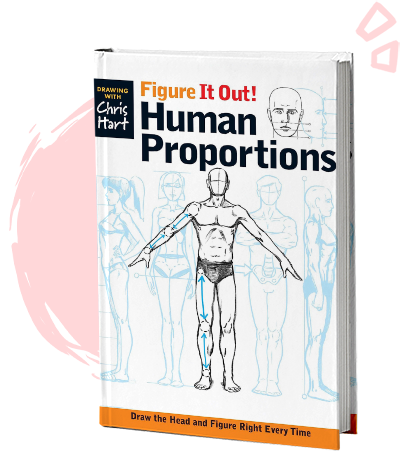
Our must-have drawing books
This book covers the key principles of drawing, including proportions! By studying shapes and volumes, it will become much easier to draw the human body.
Artists shouldn’t have to be mathematicians. Figure Drawing in Proportion introduces a better, more intuitive, less intimidating way to get proportions right.
Even beginners can draw with proportions. This book is full of references from any angles, perfect to study and learn!
To summarize
Drawing a character with good proportions is a matter of ratios. By using the 8-heads method, we can already better understand the relationship between different parts of the human body.
All the little tips are worth remembering to provide us with reference points. With these reference points, we can play with our proportions and adapt them.
Simplifying shapes and volumes remains essential for drawing any pose. Drawing in 3D allows us to practice maintaining our proportions while drawing dynamic poses.
But for that, it’s important to practice regularly and develop our instinct through consistent drawing sessions. Happy practicing! ✍️

Save the article for future reference!
By hovering over the image, you can directly save the article to your Pinterest account. This also allows us to share the article with a wider audience of aspiring artists!


9 comments
yes, very well explained and simply, thanks again
Always a pleasure ✨
Simple and effective! Thank you
You’re welcome 😊
Oh, I just discovered this article, it’s really amazing!! Thank you very much!!
You’re very welcome Floriane! I’m really glad you liked it, and thank you for your kind feedback! 😊
Awesome, thank you very much for this lesson
Beautiful simplification of the human body in drawing! I’m going to put these tips into practice and practice. Thank you.
Very enlightening! Thank you very much