Drawing hands can be very intimidating when we are starting out in art. A hand consists of 27 bones and about fifteen joints. It’s understandable that we might find it daunting to try and draw them!
However, let’s not be discouraged. Just because it seems difficult doesn’t mean it actually is! In reality, there are simple methods that we can use to learn how to draw hands easily.
Discover our free guide to start drawing easily. You will learn practical methods and exercises to put into practice right away.
Changing our perspective on drawing and learning to recognize simple shapes is absolutely essential.
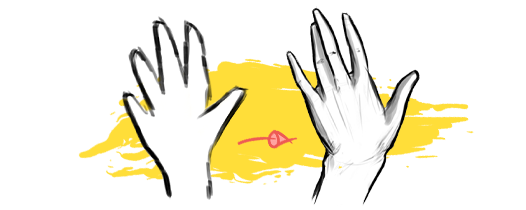
When we start out, we tend to automatically draw the outlines of what we see without taking the time to observe carefully.
We try to draw each finger individually, guessing roughly where to place our strokes. The result is often a flat and unrealistic drawing.
Taking the time to analyze and observe
To stop focusing on the outlines and achieve realistic hand drawings, we will learn to simplify what we see and think in terms of shapes.
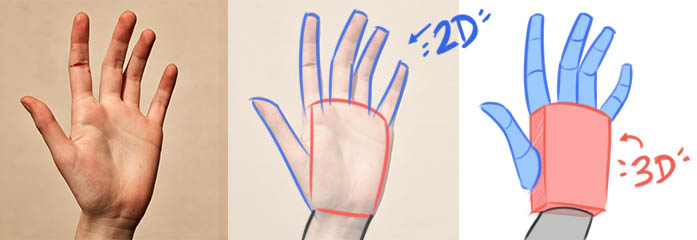
Each element is composed of simple shapes. Instead of seeing a finger, learn to see a rectangle or a cylinder! The goal is to simplify as much as possible what you intend to draw.
First, we will learn to see 2D shapes to train our eyes to take the time to observe. Then, to create more volume and realism, we will switch our vision to 3D mode.
The elements of the hand
The palm
The palm of the hand can be simplified to its most basic shape: a slightly rounded square. In terms of volume, it becomes a sort of flattened and curved cube.
The thumb
The thumb is unique and can move in all directions. It is directly attached to the palm of the hand by a triangle.
The fingers
The fingers can also be simplified to their most basic shape: rectangles. In terms of volume, they can be seen as cylinders.
The wrist
The wrist can be represented as a simple rectangle with the ends slightly widened. In terms of volume, it forms a cylinder.
2 - Proportion tips
No need to delve into anatomical details to manage our proportions well. Let’s just remember these rules and tips to apply them every time we draw a hand. This way, we’ll ensure that our drawing will be credible and realistic.
1
The height of the palm of the hand is equivalent to the length of the fingers. Of course, proportions may vary from person to person. It’s simply a guideline that you are free to play with when drawing your hands according to your style.
💡 The palm of the hand is larger than the back of the hand. This creates the illusion that the fingers appear shorter when we look at the palm.
2
About the fingers, the middle finger is the longest. The index and ring fingers are approximately the same length, and the little finger is about 2/3 the length of the ring finger.
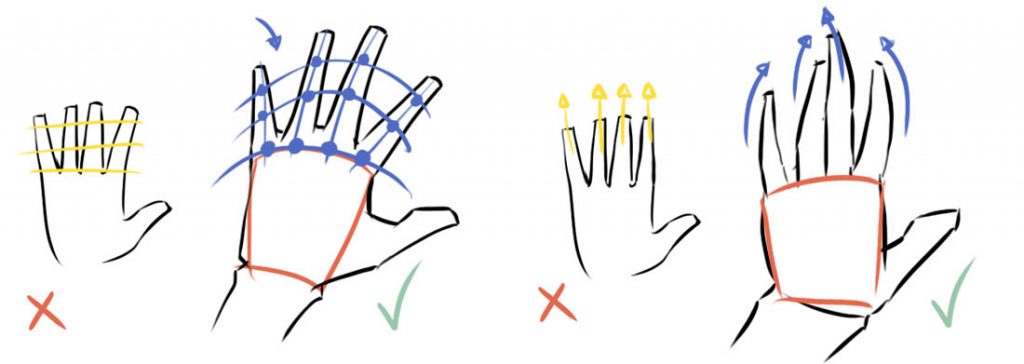
Each finger has three joints that are not aligned in a straight line. When looking at our fingers, we can see that they follow the curve of the palm.
The fingers are not completely straight; it is essential to slightly curve them to add realism. The tip of the finger is usually thinner. The idea is to vary the thickness of the fingers depending on the characters we are drawing.
3
The hand is also wider than the wrist: the thumb joint sticks out. By creating a relief at the level of the thumb, we will achieve more solid and realistic hand drawings.
📌 Quick exercise
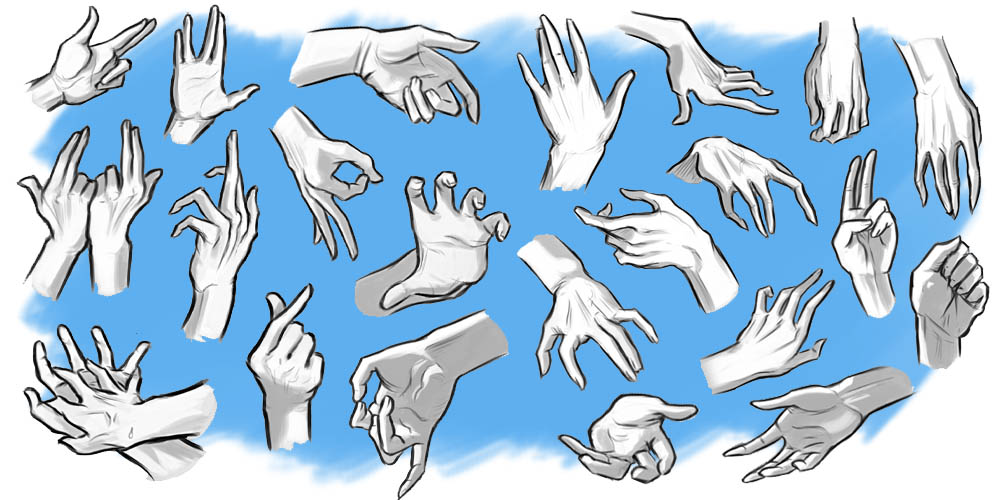
Alright, we’re going to draw our first hands. To do that, we’ll practice recognizing shapes using visual references.
Create a simplified sketch on the reference. This will help you better identify the different parts of the hand.
3
Redraw your simplified sketch, but this time, draw it next to your reference. The goal is to train your sense of proportions and your ability to simplify shapes.
4
Create your final drawing over your construction sketch. The idea is to add more curves and fluidity by rounding our shapes.
3 - The process for drawing dynamic hands
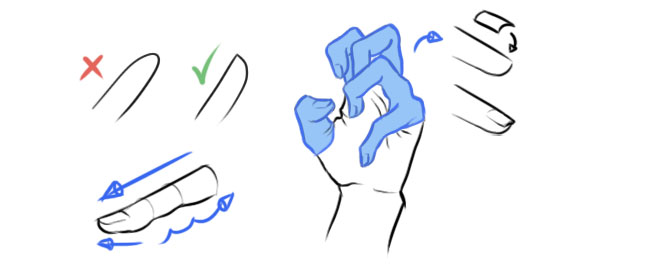
The mittens technique
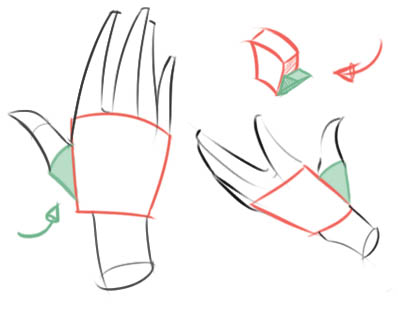
To draw hands more easily, we will use the “mittens” method. As you can imagine, this involves drawing all the fingers together as a single unit in the beginning!
After drawing the palm, the idea is to draw a triangle to represent the whole of our fingers. This will allow us to quickly outline the overall shape of the hand without focusing on each finger. Then, we can adjust the position of each finger by cutting into this triangular shape.
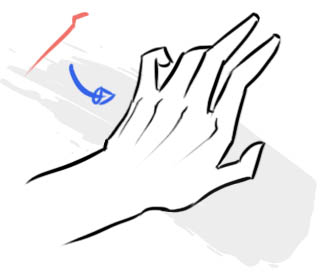
Detach one finger
To make our hands look more natural, we will then use a technique that involves isolating one finger. We detach the index or the little finger to add realism to our drawing.
Most professionals use this simple trick to create credible hands effortlessly. Look at the examples on the right side of the image: the artist Loish often uses it! It’s the tip to remember and apply in your hand drawings.
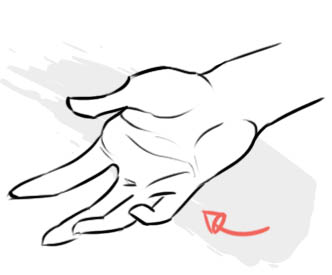
Detach two fingers
A slight variation to achieve a hand that is both natural and dynamic is to group only the middle and ring fingers together, while leaving the index and little fingers detached.
4 - Thinking in 3D: Construction
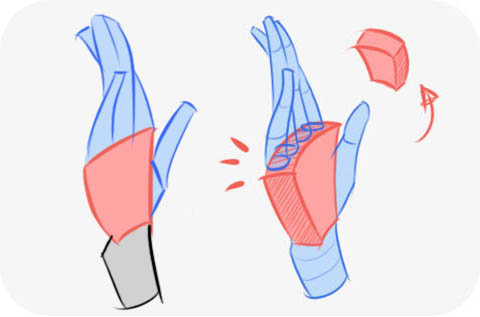
To add realism to our drawings, it is essential to switch our perspective to 3D mode. Recognizing shapes in 2D is a good start, but by creating 3D shapes, we will be able to draw hands from various angles more easily.
Drawing the hand in volumes will help us better understand where to place our details and shadows. It is through this step that our drawing will become credible and realistic.
Drawing in volume is not only useful for hands but for any element we want to draw.
By thinking in 3D, we first lay down a construction sketch before creating our final drawing. Drawing hands, and even any subject, becomes much more accessible!
5 - Details to add realism
Now that you know the basics of drawing a hand, we can focus on the details. To achieve a sufficiently realistic drawing, we will pay attention to some essential anatomical elements.
The back of the hand
The sketch
Start by drawing your hand step by step: the palm, the fingers, and then the wrist. Create your sketch to add the details later.
The metacarpals
On the top of your hand, the most visible bones are the metacarpals. You can see their heads at the base of your fingers. Simplify them using a simple triangular shape.
The tendons
The tendons are also visible and extend from the metacarpals to the wrist. You can simply draw a few lines to suggest them.
The skin
The fingers extend a bit further, revealing the skin that connects them together. Extend the lines of your fingers to automatically add depth to your drawing.
Palm view of the hand
The muscles
The two most visible muscles of the hand are located in the palm. Trace their outline lightly to suggest their volume.
The skin folds
The palm of the hand has several creases that you can draw with thin lines. Also, mark the fold of the skin at the level of the little finger. Drawing it helps emphasize the volume of the palm.
Drawing the fingers
The finger is made up of three cylinders representing our three phalanges. By observing your own fingers, you can notice that each joint is thicker.
The joints look like two squares with a slight indentation between them. They also stand out more when the finger is bent.
The underside of the fingers has a slight layer of fat, giving them their rounded appearance. You can easily represent it by playing with curves. However, flatten the tips of the fingers to add more realism.
Imagine the nails like thin sheets of paper that conform to the shape of your fingers. The nails follow the curvature of the finger. You don’t need to make lines of the same thickness; a thin stroke is enough to suggest the nails.
Here, we learn to understand anatomy in more depth through clear drawing processes filled with tips, exercises, and practical training to undertake.
To summarize
It is not necessary to understand anatomy in great detail to succeed in drawing hands.
The fundamentals are essential for achieving great results. Learning to observe like an artist to recognize shapes is the first thing you need to master.
By then practicing to construct your hand drawings in 3D, while considering the 2D proportions, you will quickly make progress.✍️
Enregistre l'article pour le garder sous la main !
Passe ta souris sur l’image pour enregistrer l’article sur ton compte Pinterest. Tu pourras ainsi le relire quand tu veux. Super pratique !
Thank you so much, Kazengoshi! That really warms my heart!
Michael Hampton’s work is incredible and super inspiring, glad you share the same opinion! 😀
Well, I’m following the tutorials, it’s okay, I understood even if I struggle a bit, aha! Well, it’s just a matter of practice. However, your hand reference sheet is no longer available ^^
Thanks for this article!
You’re welcome! If it can help with understanding, it’s already a big step! ☀️ The link for the Pinterest reference sheet has been restored, thank you so much!
To provide the best experiences, we use technologies such as cookies to store and/or access information on devices. Consenting to these technologies will allow us to process data such as browsing behavior or unique IDs on this site. Not consenting or withdrawing consent may have a negative impact on certain features and functions.
Functional
Always active
Storage or technical access is strictly necessary for the legitimate interest of enabling the use of a specific service explicitly requested by the subscriber or user, or for the sole purpose of transmitting a communication over an electronic communications network.
Preferences
The technical storage or access is necessary for the legitimate purpose of storing preferences that are not requested by the subscriber or user.
Statistics
The technical storage or access that is used exclusively for statistical purposes.Storage or technical access that is used exclusively for anonymous statistical purposes. In the absence of a subpoena, voluntary compliance by your Internet service provider, or additional records from a third party, the information stored or accessed for this sole purpose generally cannot be used to identify you.
Marketing
Storage or technical access is necessary to create user profiles for sending advertisements or to track the user on a website or across multiple websites with similar marketing purposes.


6 comments
Excellent work! A tremendous job… clear and incredibly well-written.
Very good tutorial on hands, one of the best I’ve ever read on the internet (in any language!).
Also, I agree about Michael Hampton’s book… 😉
Thank you so much, Kazengoshi! That really warms my heart!
Michael Hampton’s work is incredible and super inspiring, glad you share the same opinion! 😀
Great tutorial, simple, precise, and pedagogical at the same time.
Thanks for sharing! 😉
With great pleasure! Thank you for this kind message ✨
Well, I’m following the tutorials, it’s okay, I understood even if I struggle a bit, aha! Well, it’s just a matter of practice. However, your hand reference sheet is no longer available ^^
Thanks for this article!
You’re welcome! If it can help with understanding, it’s already a big step! ☀️ The link for the Pinterest reference sheet has been restored, thank you so much!