Drawing feet can seem intimidating when you’re starting out in drawing. With its 26 bones and 16 joints, a foot is almost as complex as a hand. Understanding how to draw a foot can, therefore, seem very challenging.
However, even for a beginner, it is possible to succeed in drawing a foot more easily than you might think, thanks to simple methods. By changing our perspective, we can achieve satisfying results without having to meticulously study anatomy.
In this article, we will explore the basics of learning how to draw a foot, and you’ll see that it’s not as complicated as it may seem.
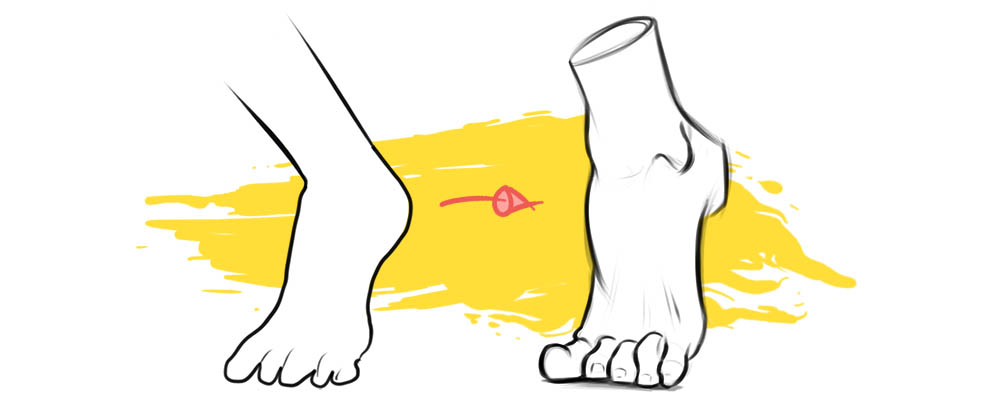
It is crucial to change our perspective and no longer focus on the contours of a complex shape. The idea is to be able to see a simple form behind this complex shape.
Discover our free guide to start drawing easily. You will learn practical methods and exercises to put into practice right away.
First, we will learn to recognize 2D shapes and take the time to observe what makes up a foot. Then, to create more volume and realism, it is necessary to develop our 3D vision and learn to construct our drawing.
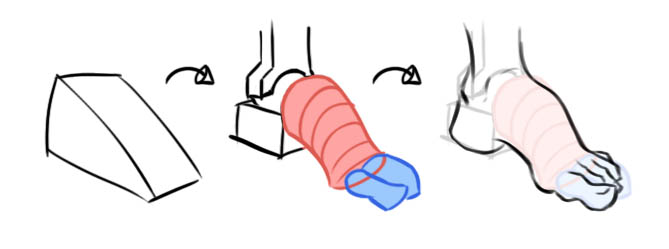
The foot is a simple triangle
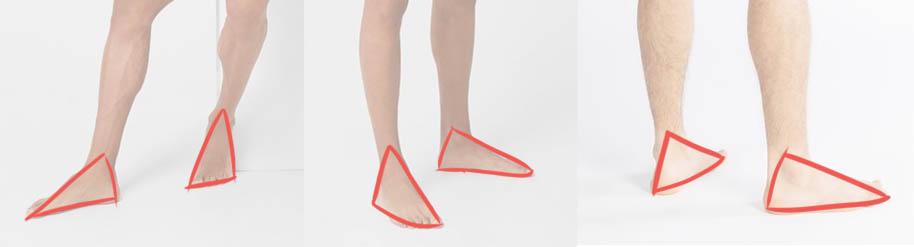
If we had to draw a foot in the simplest way possible and with the fewest lines, it would take the form of a triangle.
No need to complicate things by studying each bone meticulously. The key is to first understand how to simplify the shape of the foot to draw it easily.
Let’s start by drawing feet imagining them as simple triangles. This way, we will be able to draw them more accurately in perspective, at the right angle.
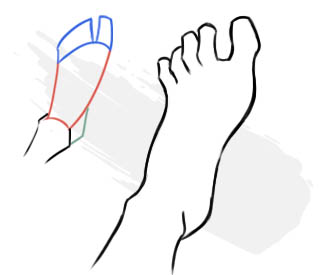
The elements of the foot
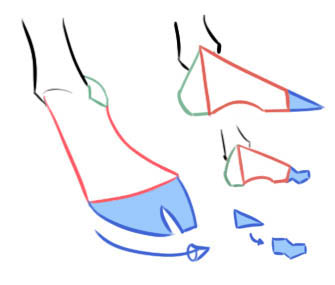
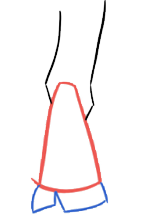
In order to give our drawing of a foot a realistic and credible appearance, we need to start with our initial triangle and divide it into several parts.
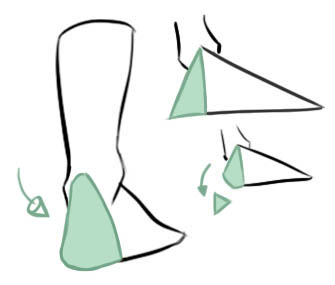
The heel
The heel is an integral part of the foot. We simply need to cut off the pointed part of the triangle to round it.
The sole of the foot
This part also includes the top of the foot; it is the central element. The foot is slightly concave, as if the heel raises it.
The toes
The toes can be divided into two groups. On one side, we have the big toe, and on the other side, we group together the four others to simplify. They are, in the end, simple rectangles.
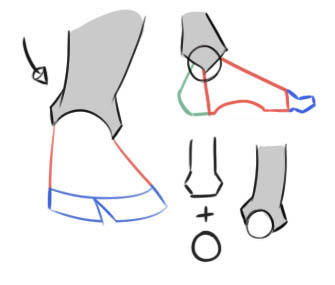
The ankle
Just like the wrist, the ankle can be simplified into a rectangular shape with wider ends, much like a wrench!
2 - Proportion tips
No need to drown ourselves in anatomical details that won’t be useful for us at the moment. Let’s focus on the essentials by exploring some simple proportion tips that you can already start applying.
The idea is to memorize them and incorporate them into our drawings, which will automatically add more realism and credibility to our artwork.
1
The ankle is asymmetrical! It is not located on a horizontal line but tilts slightly. The bone is higher on the side of the big toe and lower on the opposite side.
💡 Asymmetry helps to draw the foot more effectively, creating depth and enhancing realism.
2
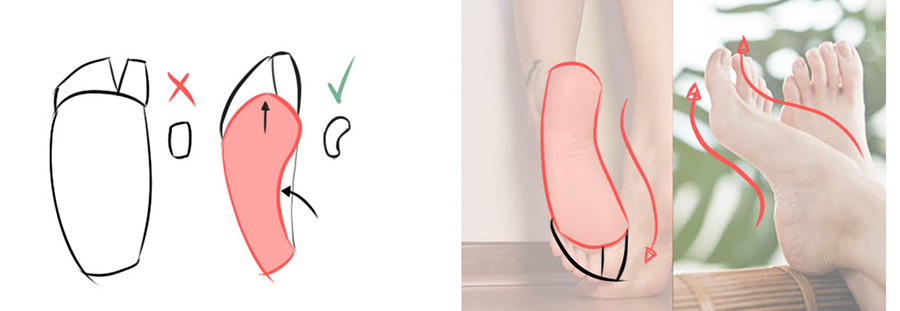
The arch of the foot is not straight; it is curved and rounded. This curvature is even more visible from underneath. It is wider than the heel and tapers towards its center.
Drawing a foot as a triangle is a good start. Now, let’s delve deeper: the sole of the foot takes the shape of a rounded rectangle, with the heel narrower than the front of the foot.
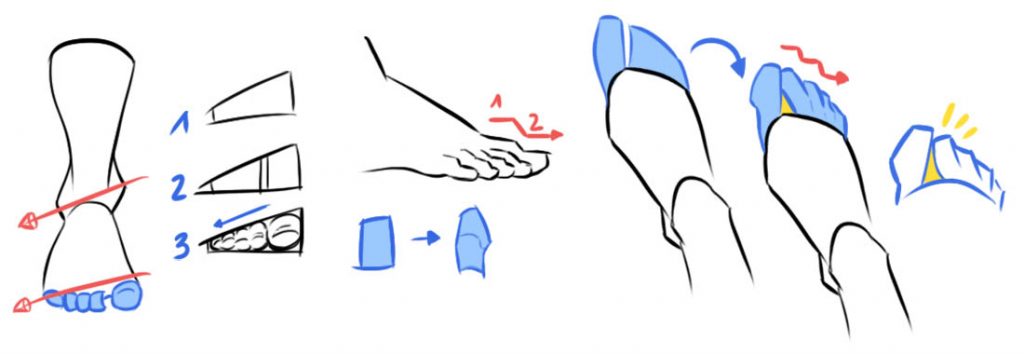
3
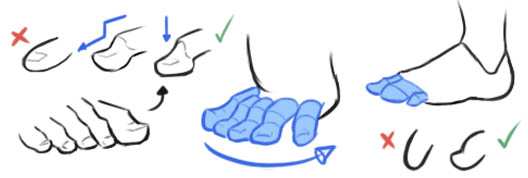
The toes follow the tilt of the ankle. The big toe is higher than the other toes, which gradually decrease in size. They form a kind of staircase extending from the sole of the foot to the ground.
A handy tip is to draw the shape of a small triangle between the big toe and the other toes to create an empty space. This adds movement in a straightforward way!
📌 Quick exercise
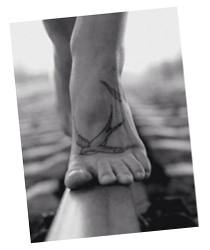
Let’s go, we are going to draw our first simplified version of feet. For that, we will practice recognizing the different elements using reference photos.
Create a simplified sketch on the reference. This will help you better identify the different parts of the foot.
3
Redraw your simplified sketch, but this time, draw it next to your reference. The goal is to train your sense of proportions and your ability to simplify shapes.
4
Create your final drawing over your construction sketch. The idea is to add more curves and fluidity by rounding our shapes.
3 - Adding dynamism
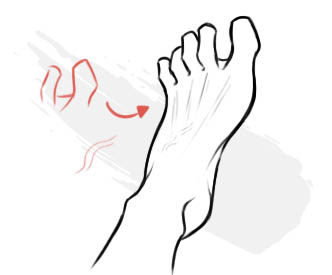
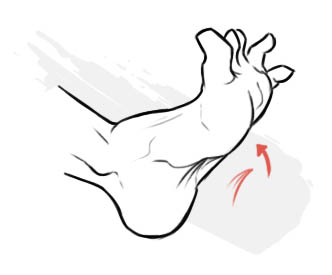
Gesture
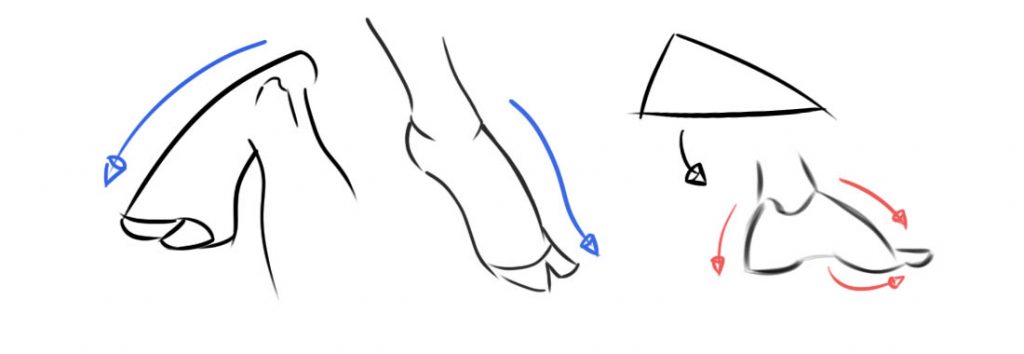
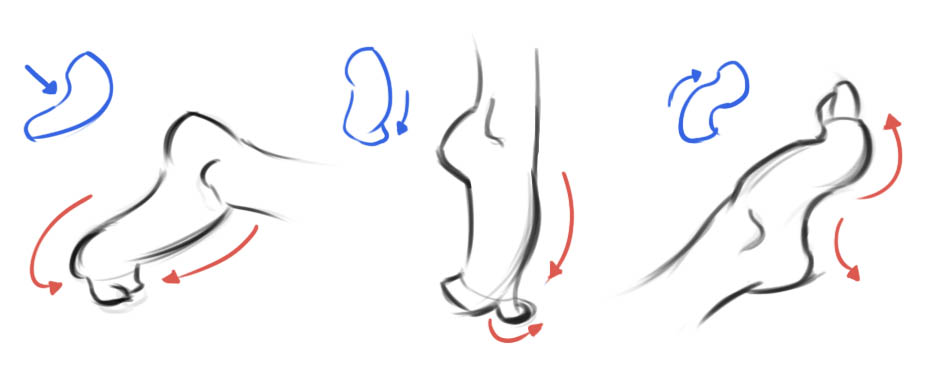
To infuse dynamism into our drawing, we need to simplify the movement by using long curves to represent it.
Let’s break down the triangle into multiple curves to make the foot more fluid and lively. A single curve can be enough to define the entire gesture of the foot and add more dynamism to it!
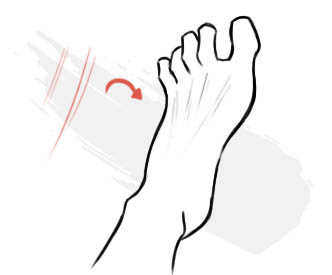
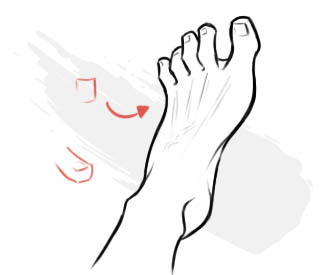
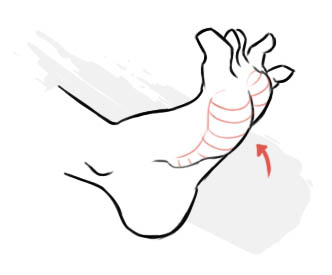
Pressure & Force
Thinking about the force exerted by the foot is essential when drawing it. We are not drawing a simple lifeless object, but an organic form!
Imitating the pose of our reference can be very helpful in understanding how the weight of the body exerts pressure against the ground. This will help us make our drawing more realistic and lively.
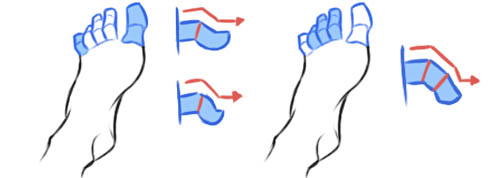
When there is pressure and weight, we should exaggerate the curves. We go over our line several times to make the tension of the foot visible.
For example, in the case of the foot in the middle, all the weight is exerted on the big toe. Therefore, we will deliberately flatten this toe against the ground and thicken the bottom line to accentuate this pressure. By doing so, we will bring more realism and life to our drawing.
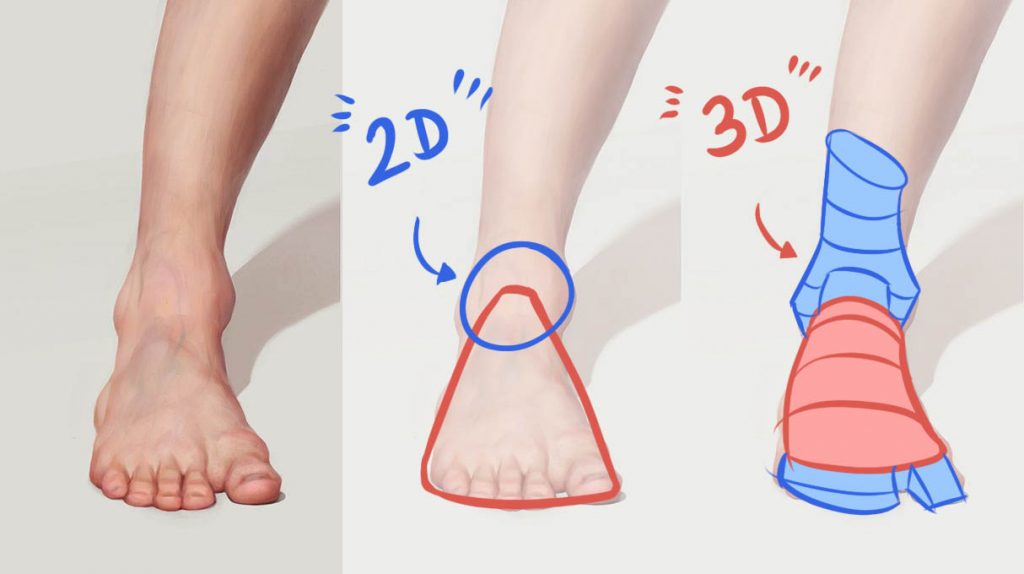
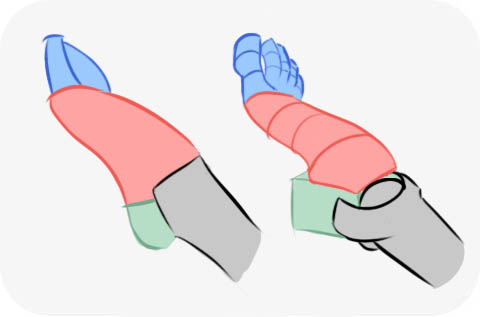
4 - Developing a 3D vision
We’ve explored how to approach the foot in its simplest form, thinking in 2D. Now, it’s time to move on to the next step and create volume.
By adopting a 3D vision, you’ll be able to draw the foot from all angles more easily.
By thinking about the foot in three dimensions, we’ll have a better sense of where to place the details later on. This essential step will help make our drawing more realistic!
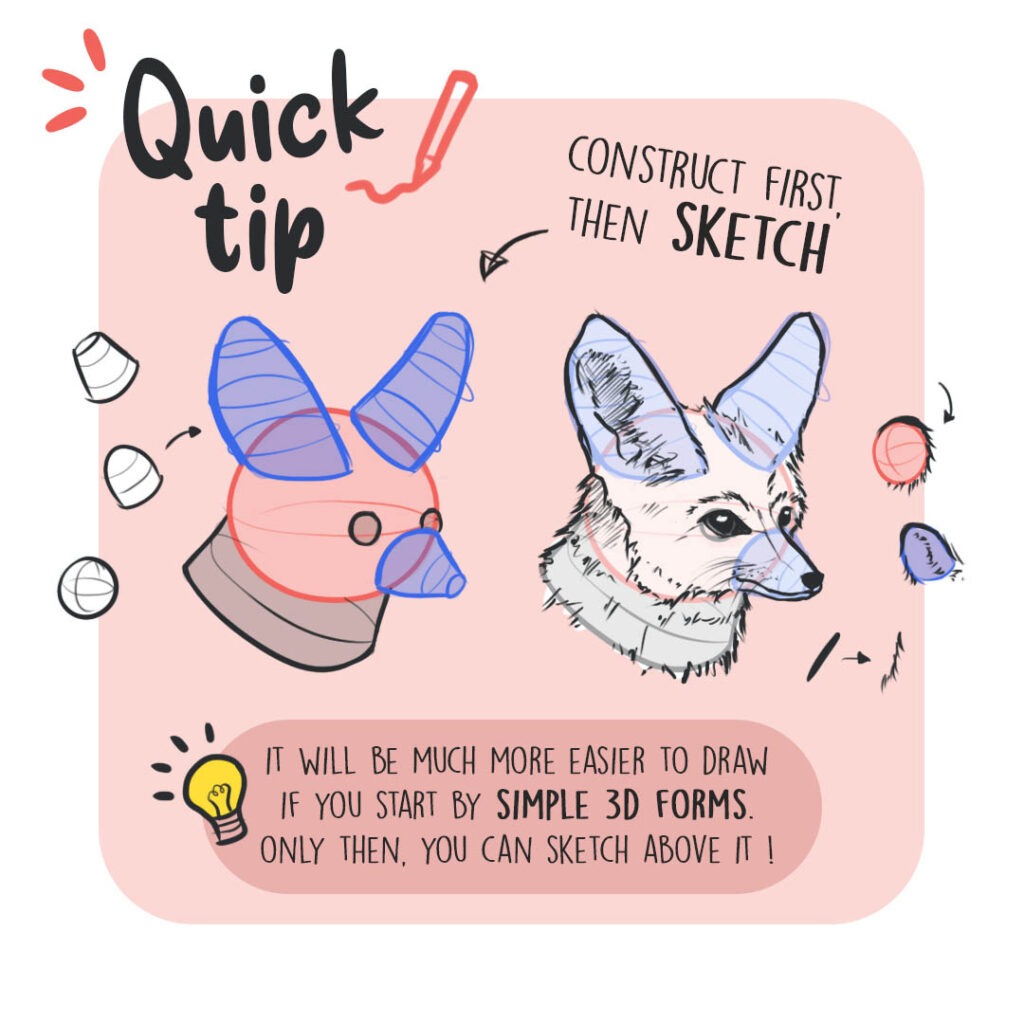
Drawing in volume applies not only to feet but to absolutely everything you want to draw.
Building your drawing is like thinking like a sculptor. You add shapes one by one to create a solid foundation with controlled proportions, much like assembling Lego blocks.
Once you have a base that you’re satisfied with, you can then proceed with your sketch and focus on the details, shadows, etc.
In the case of drawing a foot, it’s the same dynamic! We take our 2D shapes: heel, sole of the foot, toes, ankle, and we transform them into 3D.
5 - Adding details for realism
Now that we have covered the fundamentals of understanding how to draw a foot, we can tackle the details. These are the small realistic touches that will enhance the drawing! Let’s go over some essential anatomical elements.
View from the top of the foot
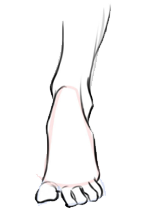
The preparatory sketch
First, let’s draw our foot step by step. Start by drawing the sole of the foot and the heel, then move on to the toes before finishing with the ankle.
The tendons
The tendons are usually visible on the top of the foot, extending towards the ankle. We can simply suggest their presence by drawing two light lines.
The skin
We can extend the lines of the toes, ankle, and arch of the foot to add more depth to our drawing. To add detail, we can even include some veins.
The nails
We can play with the thickness of our lines. The details should remain subtle so as not to distract the viewer’s attention. Let’s simply suggest the nails without drawing every contour.
View from the bottom of the foot
Muscles and fat
The lower part of the foot has a larger volume. Muscles and a layer of fat help create a beautiful curve.
Skin folds
The underside of the foot has several skin folds that we can represent with fine lines. This helps emphasize the volume and add details.
The toes
Drawing toes is quite similar to drawing fingers. The big toe has two joints while the other toes have three. They are ultimately like cylinders that taper at their ends.
The big toe follows the same logic as the thumb and is thicker at the tip, resembling a small diamond shape. The underside of the toes has a slight layer of fat. Flatten them when the foot touches the ground to create a sense of pressure.
The nails conform to the shape of your toe and are relatively flat. No need to draw all the lines to depict a realistic nail.
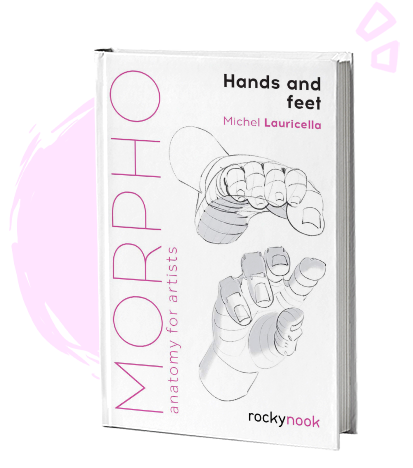
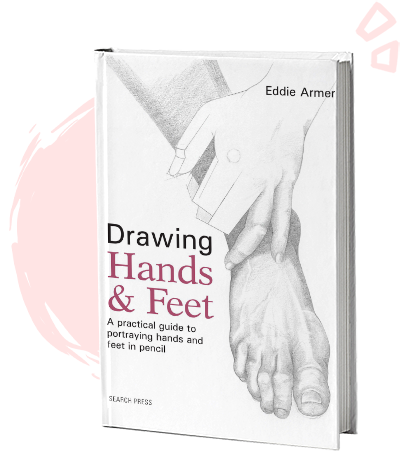
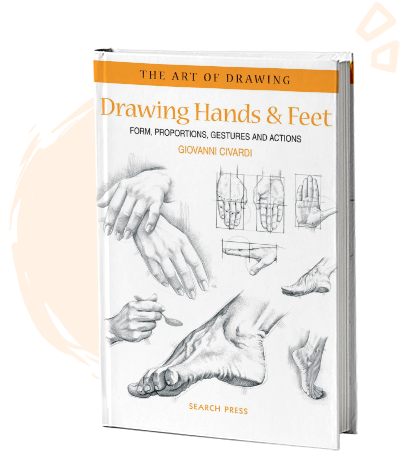
A comprehensive guide that covers all aspects of drawing feet and hands using traditional tools. The author extensively explores the topics of movement and dynamism.
To conclude
It is absolutely not necessary to perfectly understand anatomy and know every bone to succeed in drawing feet!
Of course, simplification is essential to achieve significant results. Learning to observe and simplify everything we see is truly the key to drawing. By starting with simple shapes and gradually adding volume and details, we will truly progress.
On your part, what is the biggest challenge you encounter when it comes to drawing feet? ✍️
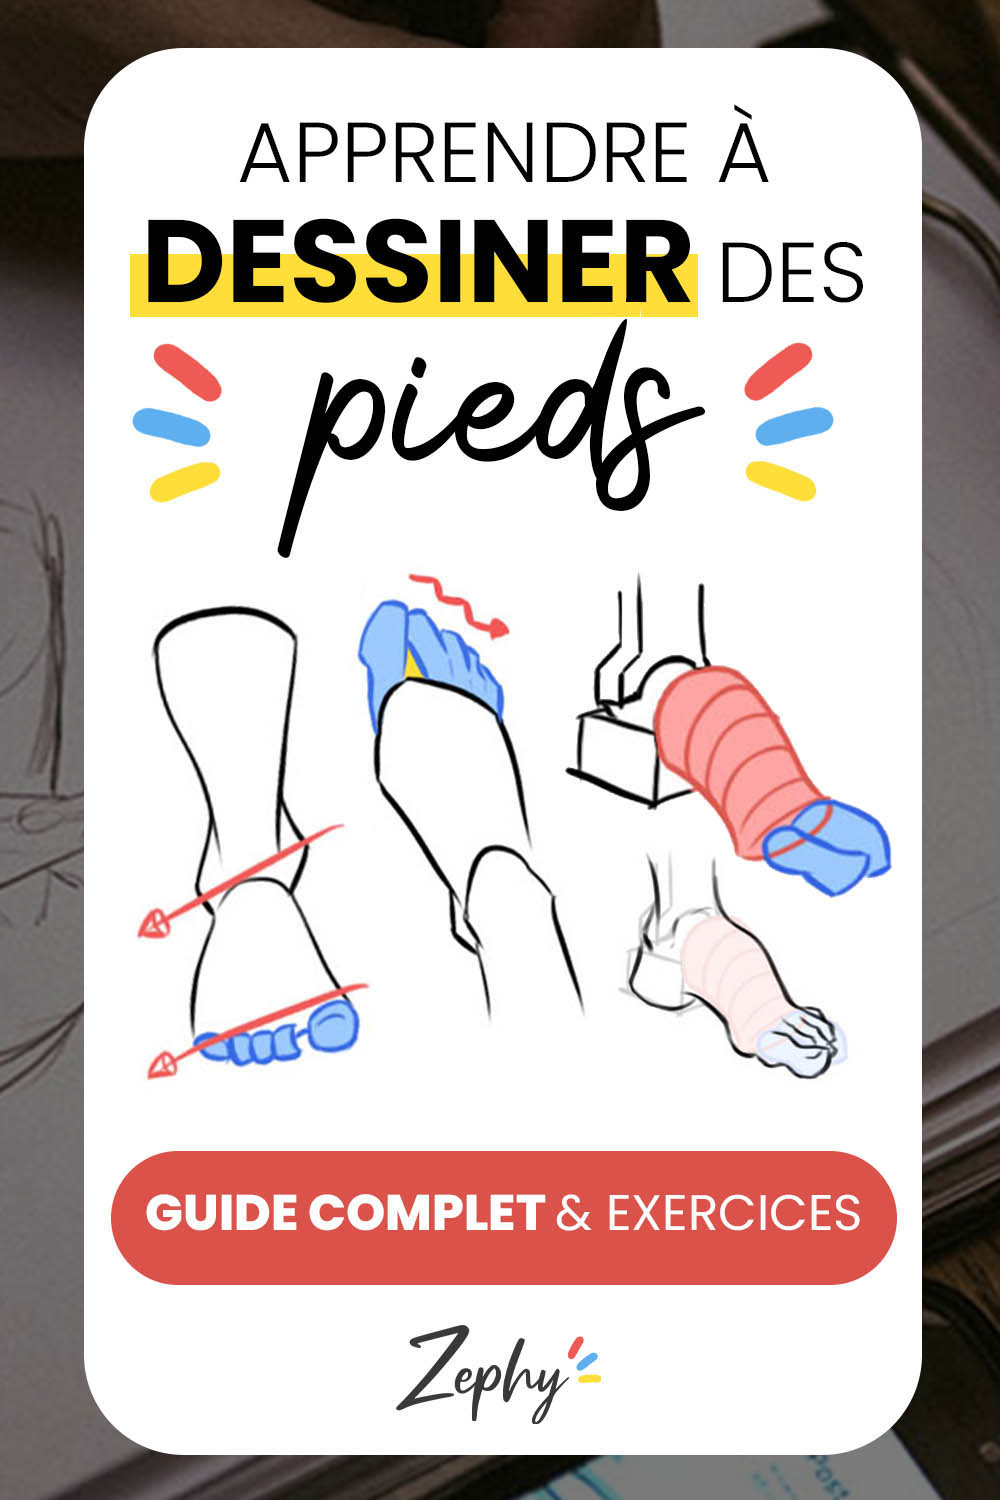
Save the article for future reference!
By hovering over the image, you can directly save the article to your Pinterest account. This also allows us to share the article with a wider audience of aspiring artists!
I didn’t know there were so many bones in just one foot 🤯🤯 !! Your articles are exactly what I needed to improve my drawing skills!!! Thank you so much!!
Hi Zephy, thank you so much for these articles! I bought your “Learn To Draw Anything” book and I love it. But I do wish it also contained more of the anatomy tips and memos. Would it be possible though to get a pdf or physical book copy of all your anatomy tips organized in place?
Hey Riley!
Thank you so much for your message, I’m really happy to hear that you’re enjoying the book!
Indeed, the book was designed to focus on the core fundamentals, which is why I couldn’t dive deeper into anatomy there, even though it’s such an important topic. That said, good news: I’m currently working on a book fully dedicated to anatomy, with all the tips, breakdowns, and memos organized in one place. It sounds exactly like what you’re looking for 😊
To provide the best experiences, we use technologies such as cookies to store and/or access information on devices. Consenting to these technologies will allow us to process data such as browsing behavior or unique IDs on this site. Not consenting or withdrawing consent may have a negative impact on certain features and functions.
Functional
Always active
Storage or technical access is strictly necessary for the legitimate interest of enabling the use of a specific service explicitly requested by the subscriber or user, or for the sole purpose of transmitting a communication over an electronic communications network.
Preferences
The technical storage or access is necessary for the legitimate purpose of storing preferences that are not requested by the subscriber or user.
Statistics
The technical storage or access that is used exclusively for statistical purposes.Storage or technical access that is used exclusively for anonymous statistical purposes. In the absence of a subpoena, voluntary compliance by your Internet service provider, or additional records from a third party, the information stored or accessed for this sole purpose generally cannot be used to identify you.
Marketing
Storage or technical access is necessary to create user profiles for sending advertisements or to track the user on a website or across multiple websites with similar marketing purposes.


8 comments
I didn’t know there were so many bones in just one foot 🤯🤯 !! Your articles are exactly what I needed to improve my drawing skills!!! Thank you so much!!
Terrifying, right? 🤭 A big thank you to you for this kind feedback, I’m thrilled to be able to help you!
This article is truly exceptional and it further ignites the passion for drawing… Thank you very much!!!
A big thank you, I’m so happy that it can help and motivate you! ✨
Drawing feet is definitely a challenge. Thanks Zephy!
You’re so welcome! I’m glad it can help 🙂
Hi Zephy, thank you so much for these articles! I bought your “Learn To Draw Anything” book and I love it. But I do wish it also contained more of the anatomy tips and memos. Would it be possible though to get a pdf or physical book copy of all your anatomy tips organized in place?
Hey Riley!
Thank you so much for your message, I’m really happy to hear that you’re enjoying the book!
Indeed, the book was designed to focus on the core fundamentals, which is why I couldn’t dive deeper into anatomy there, even though it’s such an important topic. That said, good news: I’m currently working on a book fully dedicated to anatomy, with all the tips, breakdowns, and memos organized in one place. It sounds exactly like what you’re looking for 😊
In the meantime, you can already access my free anatomy sheets here: https://en.zephy.fr/anatomy-drawing-tutorials/
Happy drawing to you!