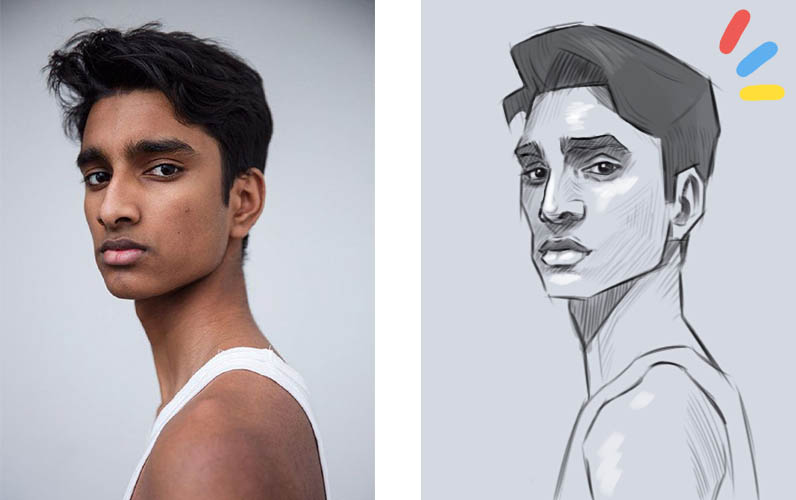
We can quickly get discouraged when we see that our portrait drawing doesn’t resemble the original photo at all. It’s because our focus is too much on the details and contours.
In general, we tend to solely concentrate on facial features (eyes, mouth, nose) while forgetting about the overall vision and proportions.
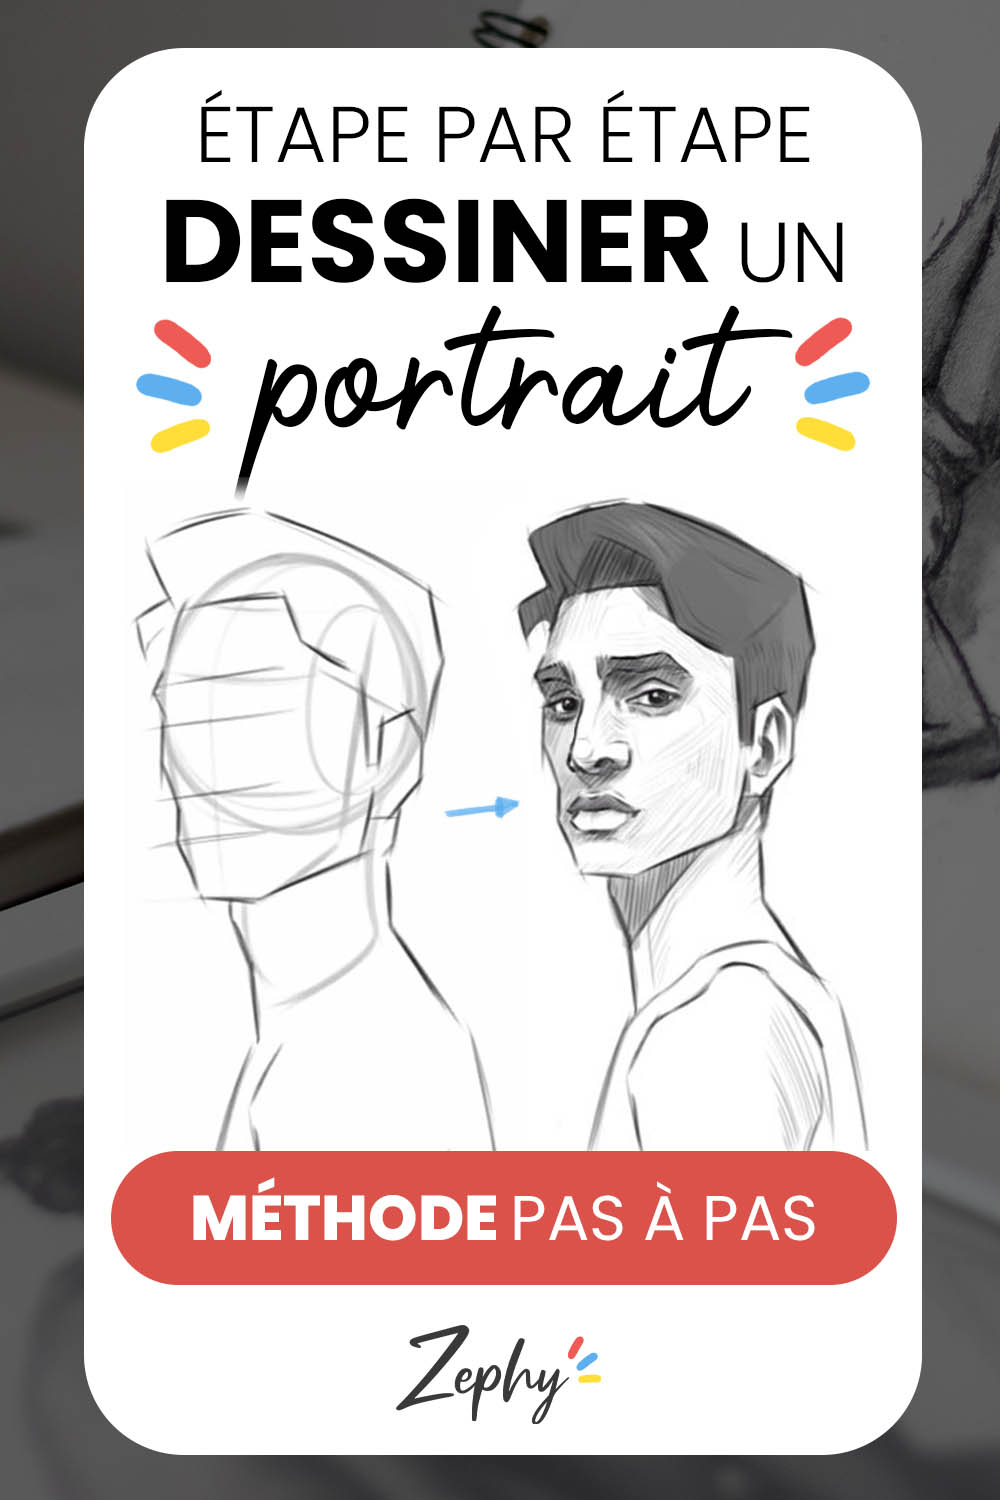
But don’t worry, we are fully capable of achieving it by breaking down our drawing process step by step! We’ll demystify all of it to make portrait drawing more accessible for you. Let’s get started! 🚀
Discover our free guide to start drawing easily. You will learn practical methods and exercises to put into practice right away.
Gathering reference photos is essential for improving in drawing. Starting with drawing from imagination is rarely a good idea when you’re a beginner.
Without a photo to rely on, you may become discouraged as you won’t know how to proceed and see that your drawing falls short. It’s an experience we’d rather avoid!
Using photos will help you boost your progress and draw in a smarter and more conscious way.
Having references is crucial as they enable you to study and comprehend the intricacies of facial anatomy.
This way, over time, you will be able to draw from imagination effortlessly!
How to choose a good photo?
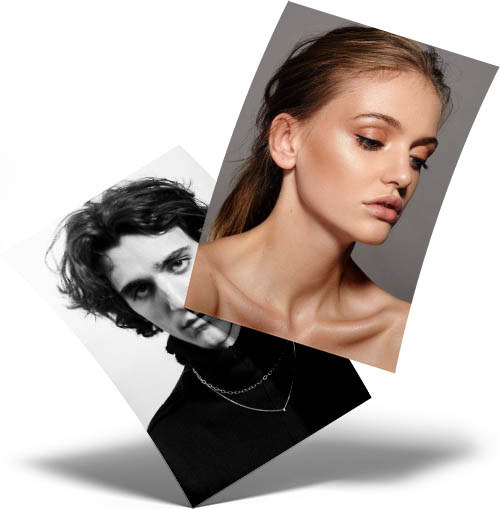
To start drawing a good portrait, it’s important to have a good reference photo. Contrary to popular belief, a photo may be visually appealing but not necessarily suitable as a reference for drawing.
Some photos can be too complex in terms of lighting or composition for a beginner to draw. Our focus today will be on choosing a good photo to start off with in portrait drawing.
💡 A good reference should:
✔️ Have a strong and identifiable light source
We should clearly see where the light source is coming from in the photo. If it’s difficult to identify, then the photo is not suitable.
In order to draw easily, we need a photo where we can easily identify the light and shadows.
✔️ Choose a good framing
The idea is to see the entire face. A cropped photo won’t help us in constructing the head.
As a beginner, we want to have all the essential elements to learn the fundamentals properly, so choose a complete photo.
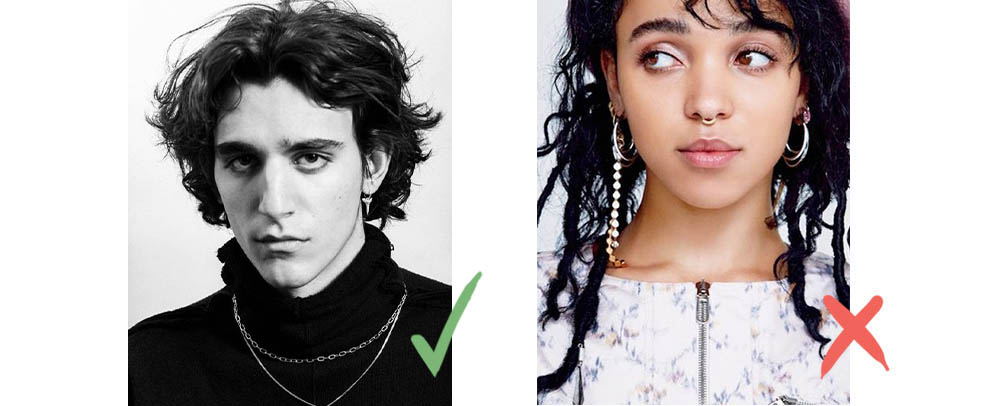
✔️ Avoir une expression neutre
Drawing certain facial expressions can be very challenging. So, let’s make it easier by starting with drawing neutral faces.
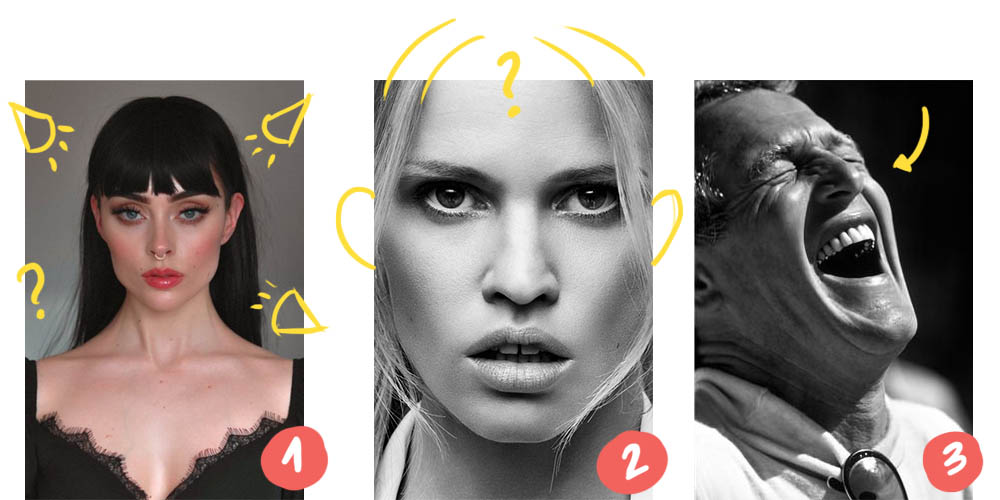
Examples of poor references for drawing
1
The first reference does not have a clearly identifiable light source. The shadows are not well-defined, everything appears very diffuse! It makes the task more complex when it comes to drawing the portrait.
2
This second photo is of good quality, with more pronounced shadows. However, it is completely cropped. We are left with only a pair of eyes, a nose, and a mouth.
We have to guess the placement of the remaining elements. Not having a complete frame will not help us progress in portraiture. We cannot reconstruct our head.
3
To start with portraits, laughter is not an easy expression to draw. There are numerous skin folds, the eyes are completely closed, the nose is scrunched up, and the mouth is wide open. We end up with too much information and details!
Where to find good references?
To practice better, Pinterest allows us to find thousands of perfect references to practice with.
We explore the essential principles of drawing a portrait in proportion using the Loomis method.
⚠️ It will be essential for the upcoming steps to learn to ignore the details. Here, we will focus on defining the structure of our drawing.
The idea is to start with the larger elements and gradually move towards the smaller ones: beginning with the overall shape of the head and leaving the details for the end.
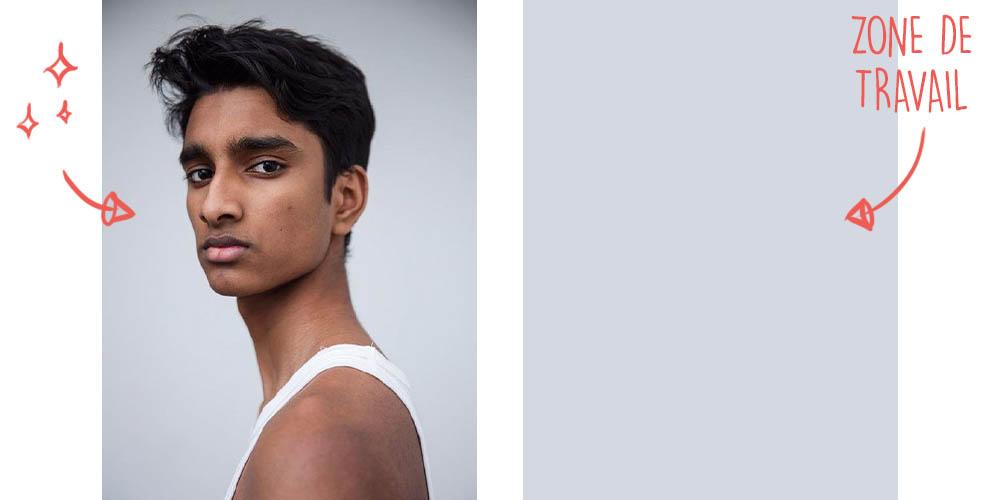
1
We choose a reference and we can even print it for better study. Having it next to us will allow us to study the proportions more effectively.
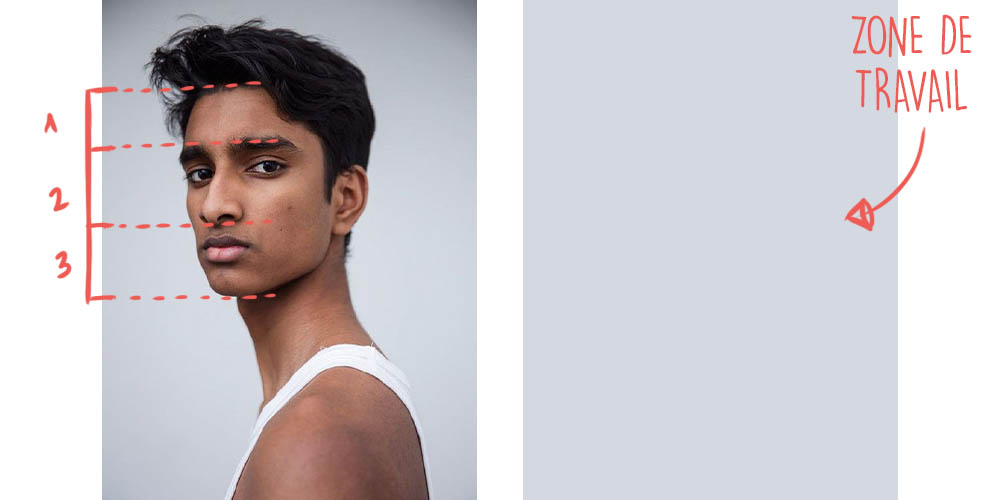
2
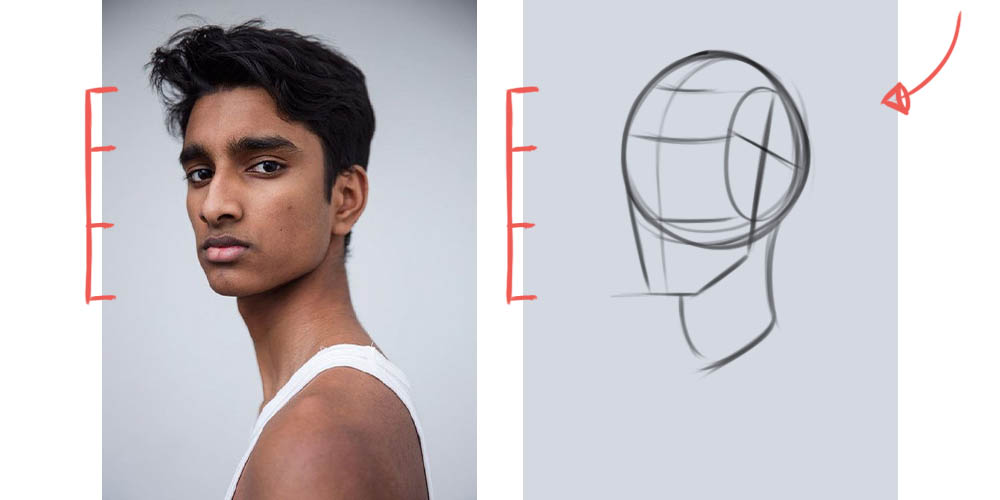
We set markers to define our proportions: the hairline, eyebrows, bottom of the nose, and chin.
In our example, we can see that the forehead is smaller, and the space between the eyebrows and the bottom of the nose is larger. We adapt our proportions to the individual!
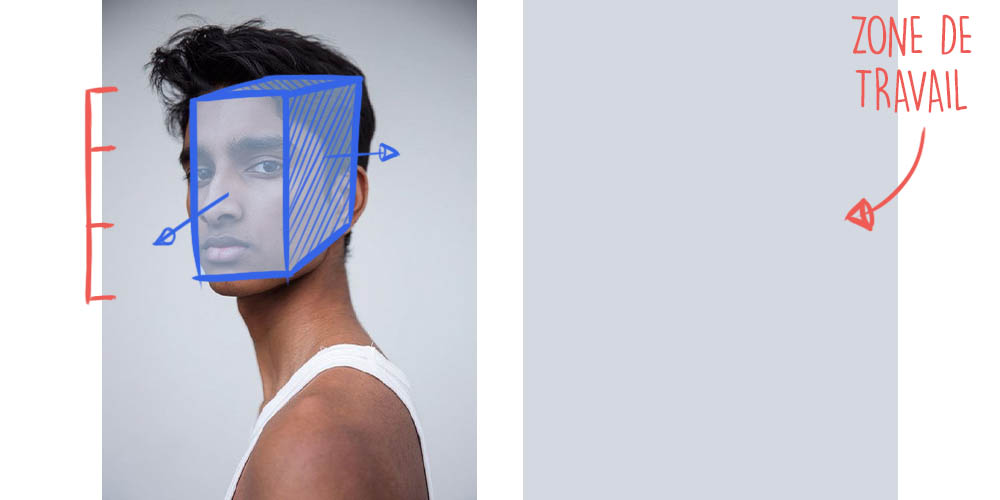
3
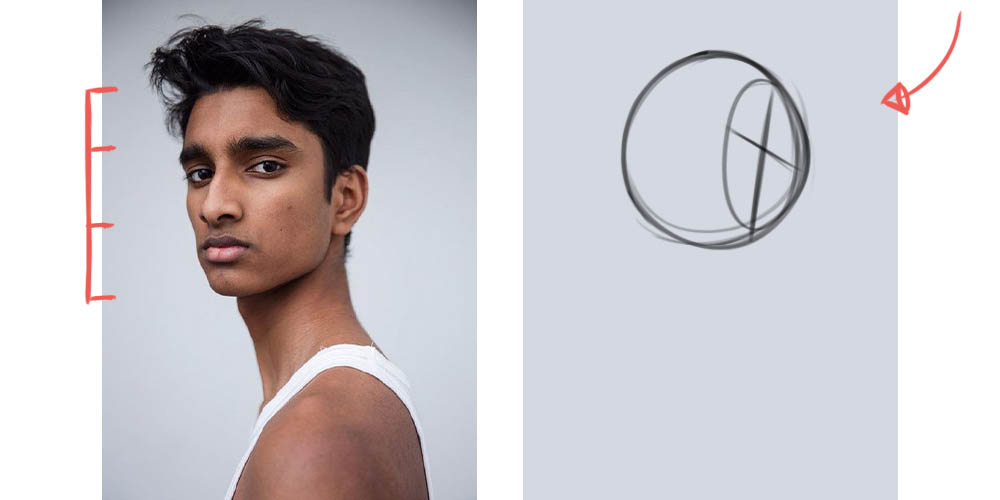
We define the angle of the head. Is the person looking straight ahead, at a 3/4 angle? Are they tilting or lowering their head?
Let’s imagine the head as a cube with different faces: the front face is easily identifiable, while the side faces start at the level of the temples.
4
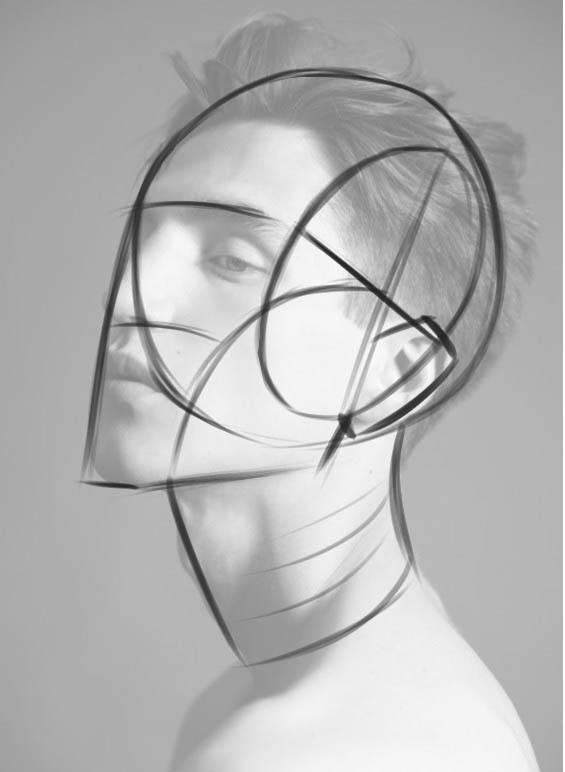
We draw the cranial mass and cut the sphere at the temple level by drawing an oval. This will represent the flattened sides of the head.
5
We draw the lines that will position the facial features based on the proportions we have defined. Then, we draw the vertical line to define the middle of the head. Next, we draw the jawline.
The idea is to draw very lightly, without pressing hard. The construction of the head is a sketch that provides us with a foundation for our portrait.
By drawing our lines very lightly, it will be easier for them to disappear under the details or to correct them if needed!
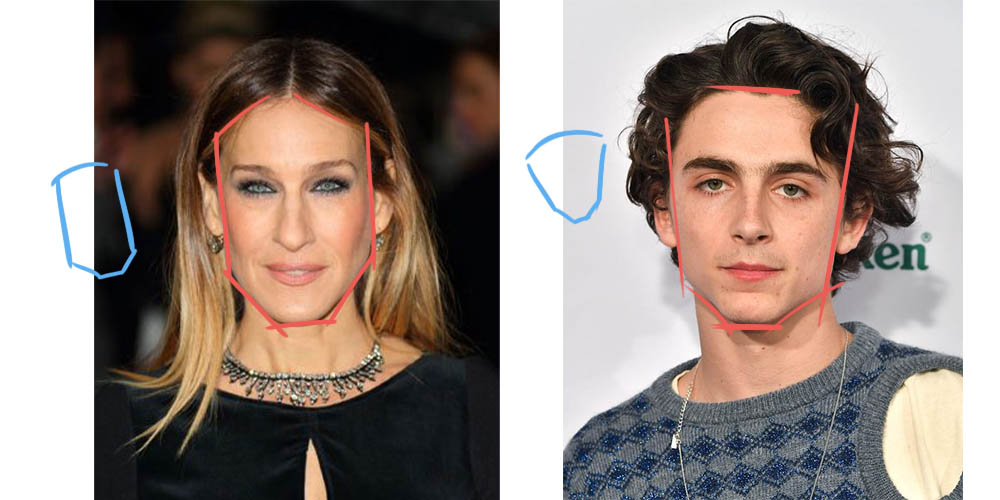
3 - The unique proportions of the individual
The proportions can really vary from one person to another: a narrower jaw, a broader forehead, a higher chin, etc. By revisiting the structure of our head, we will take the time to carefully check our proportions one by one.
Realism is not about details, but about proportions. It is essential to take the time to define the proportions before tackling the facial features. A detail can be adjusted, but a poor proportion will affect the overall drawing.
The facial features
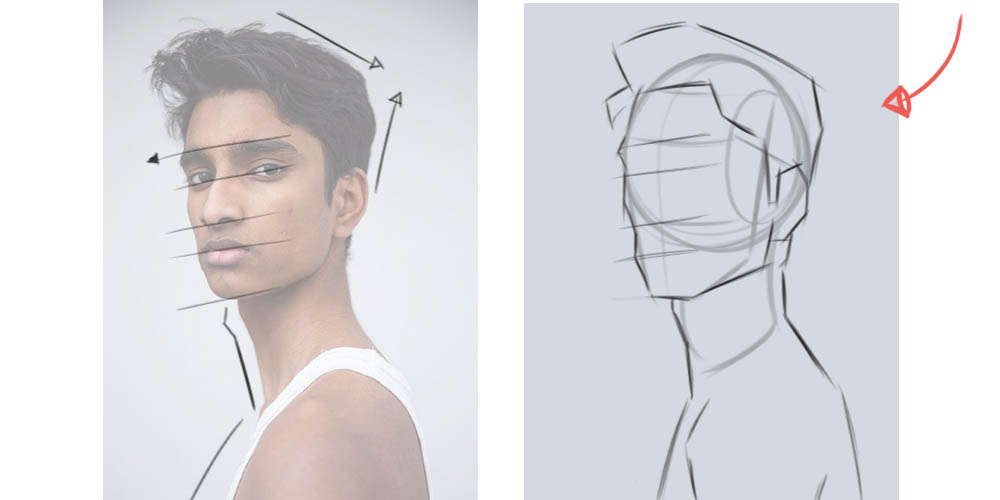
We can start by placing the facial features using straight lines. This will help us understand the angles better and accurately position the features.
The idea is to forget about the details and focus on the proportions. To do that, we need to shift our perspective to a 2D mode and check the measurements between each of the elements.
1
Start by reviewing the outline of the head. Pay close attention to the height and width, and simplify the shapes as much as possible. Ask yourself the right questions: Does the cheekbone stand out? Does this line need to be more inclined or less?
In our example, the facial features are angled, so we adjust our lines to match the model. We widen the jaw, making direct corrections to our measurements.
2
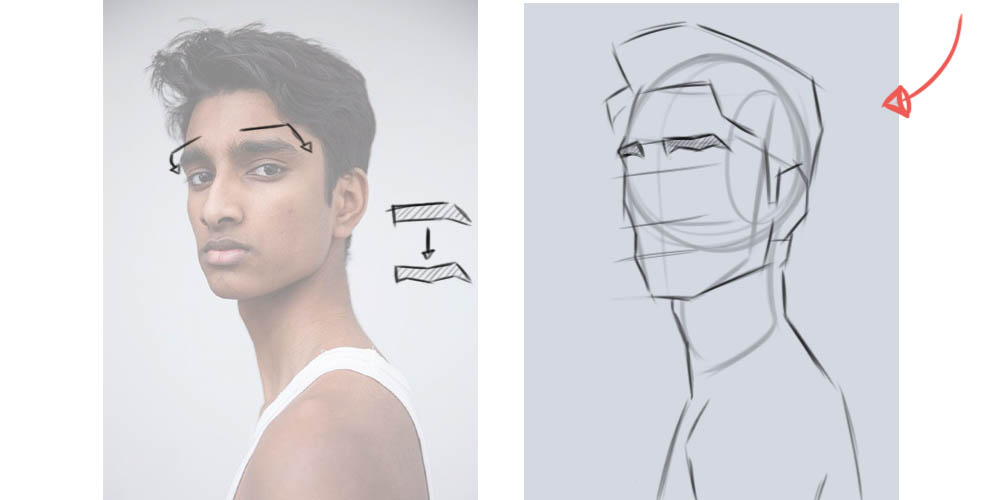
Next, place the eyebrows. They are the darkest element of the face and will serve as a reference point for positioning the eyes.
3
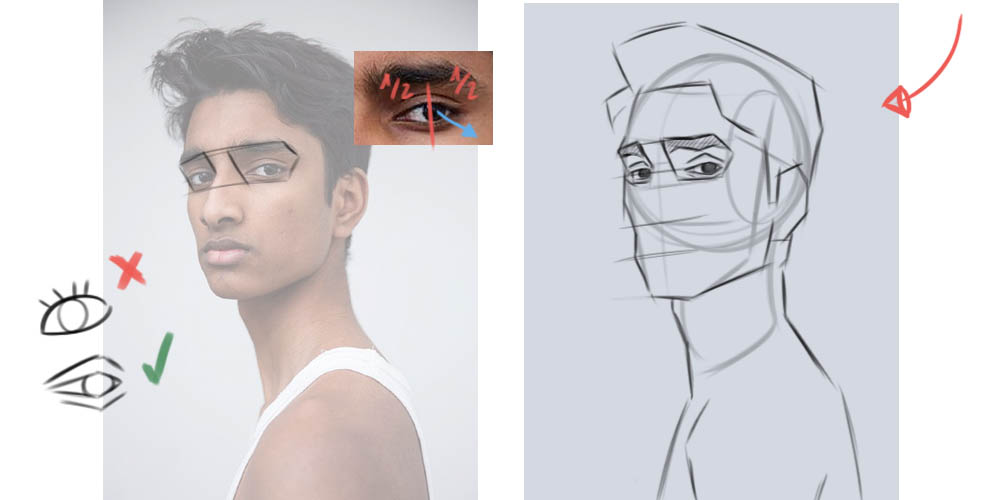
Position the eyes. Remember, they can be located on an inclined plane to create depth: the head is not flat, your eyes are in a recess. Verify the proportions using the eyebrows you have already placed.
➡️ The space between the two eyes often corresponds to the size of one eye.
4
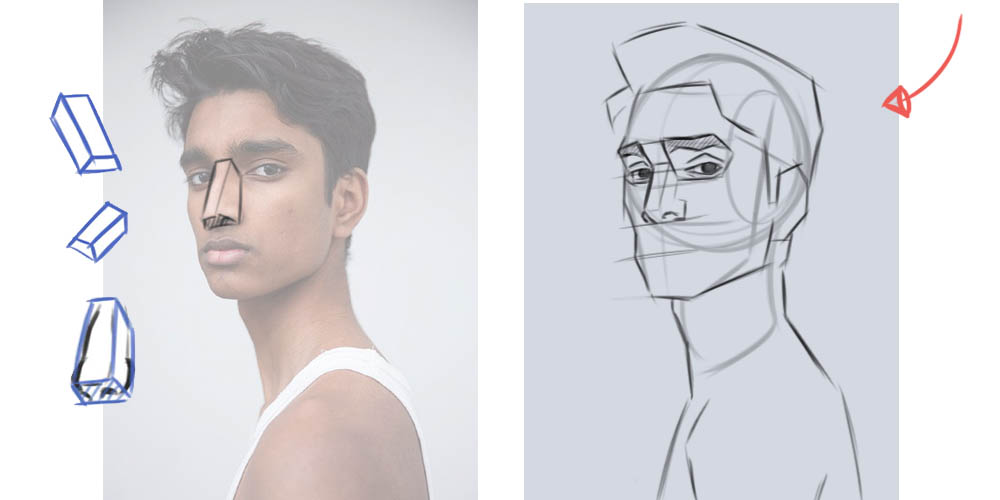
Define the nose. Always look for ratios between the elements to compare them. You can draw directly on the reference photo to assist you.
➡️ For example, the nostrils are vertically aligned with the corner of the eye.
5
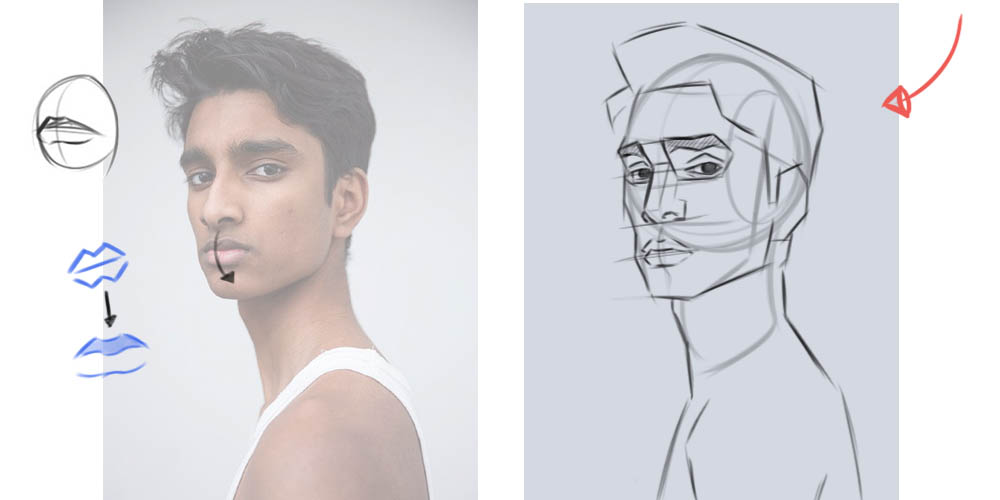
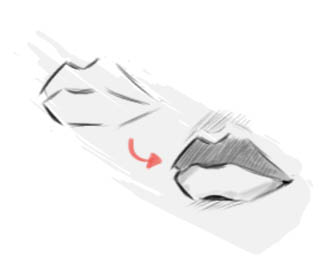
Draw the mouth. It is important to know that the mouth is not flat. It is like a small sphere, which gives it volume and makes it stand out from the face.
➡️ The corners of the mouth often align with the middle of the eye.
Continue adding your elements without getting into the details. Your hair can simply be a general mass for now.
Don’t forget to ask yourself questions for each element you position. The idea is to make each of your strokes conscious. Think about each line you make to ensure it is well placed and corresponds to the reference photo.
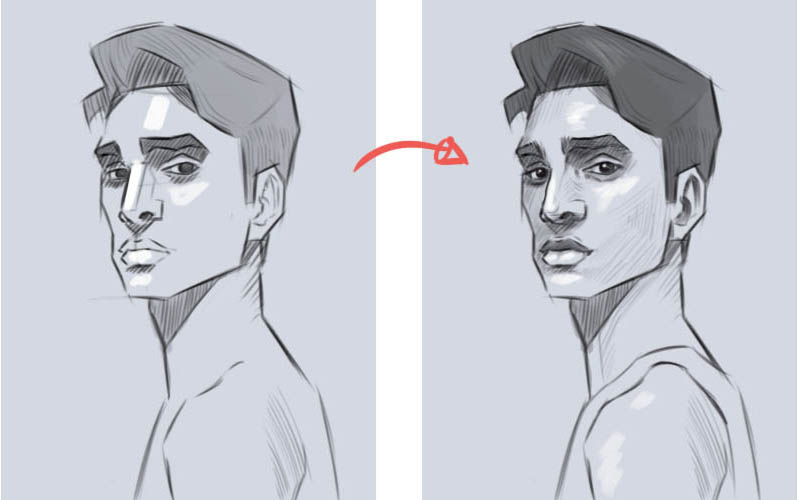
4 - Applying Shadows and Highlights
Now that we have a good preliminary sketch, we can add realism by working on the light and shadows. To make it easier and avoid overloading the portrait, we will simply define large shadow areas.
1
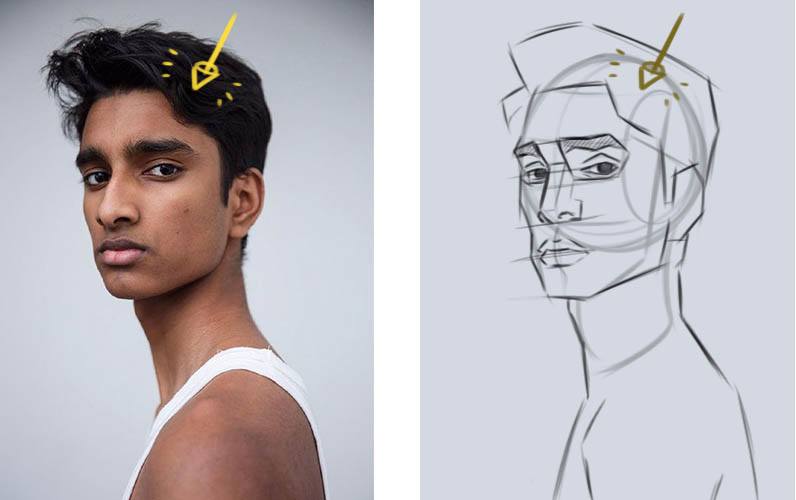
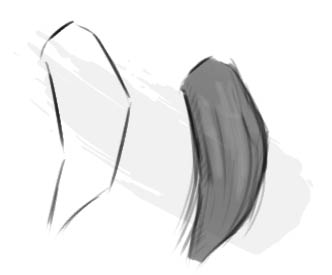
We start by identifying the main light source in the reference photo. To help us, we look at the strongest shadows to understand where the main light is coming from.
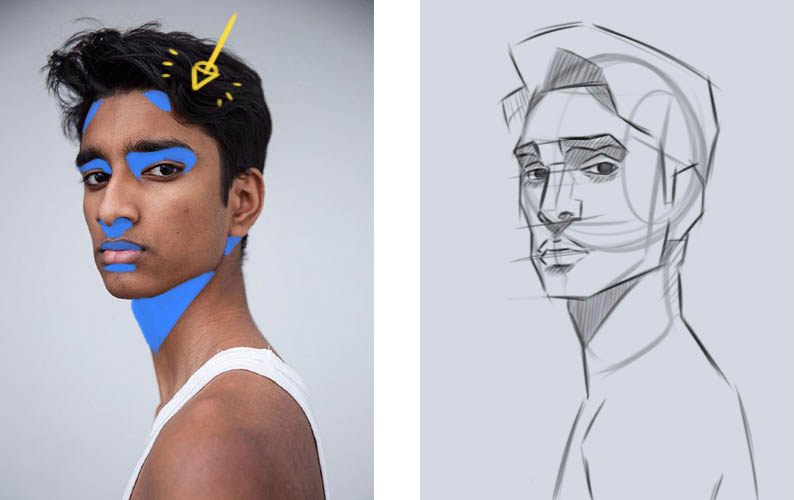
2
We trace the main shadow areas that we can easily identify. Then, we transfer them as simple shapes onto our sketch.
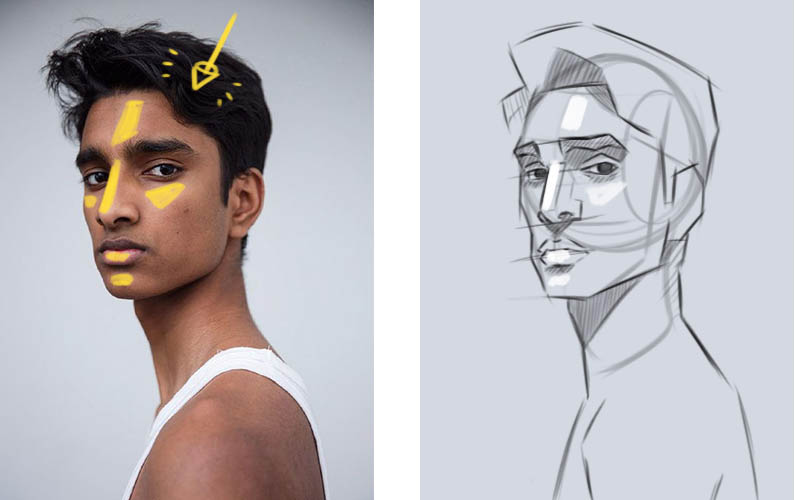
3
We define the areas where the light directly hits the face first (such as the nose, which protrudes from the face, or the forehead due to its larger surface).
Once the areas are defined, we darken the shadows gradually. There are different techniques for drawing realistic shading.
We can use hatching to create a controlled sketch-like effect in the shadow areas, or we can create gradients by using small circular strokes within the area.
If we press too hard with our pencil, we risk creating overly heavy shadows. By gradually building up the shading, the result will appear more natural.
The little trick is to work with white to represent the light. Ideally, you can draw on a kraft paper sketchbook or on slightly tinted paper.
The key is to keep it simple and not get lost in intricate details or shadows. We aim to shade our portrait in a general way to give it depth.
5 - The details to add realism
It’s time to have fun with the step we all love: the details. Now that our shapes are well positioned, we can redefine and mold them to make them more accurate.
But be careful, a portrait is not a photograph, detailing everything is unnecessary when starting out in drawing and often results in flat drawings. The idea is always to go from big to small.
We then redefine each facial feature while continuing to pay attention to our proportions. The key is to simplify as much as possible what we see to avoid getting lost.
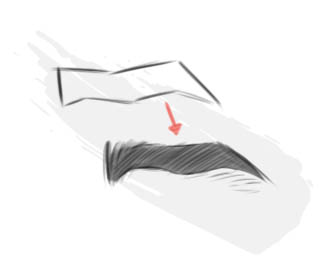
The eyebrows
We only draw a few lines that protrude from our shape. Hatchings will break the symmetry and give volume to the eyebrows.
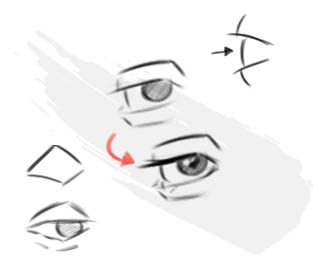
The eyes
The eye can be simplified into a trapezoid shape. There’s no need to draw every eyelash; we focus on extremely simple shapes.
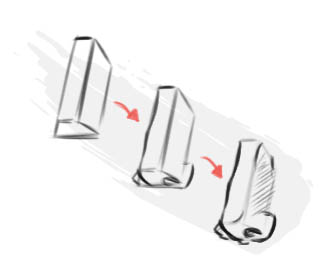
The nose
The nose can be thought of as a simple box with different sides. It then becomes easier to draw the shadows and volumes on top of it.
The mouth
The mouth has a shape like an M over a W. By darkening the upper lip, we give depth and volume to it.
The hair
Paradoxically, drawing simple shapes adds more realism. We can add just a few strokes to suggest the texture of hair.
We can take the time to define the details by referring to our reference photo. However, the resemblance will mainly depend on the accuracy of proportions! The more unnecessary details we add, the more we risk losing that resemblance.
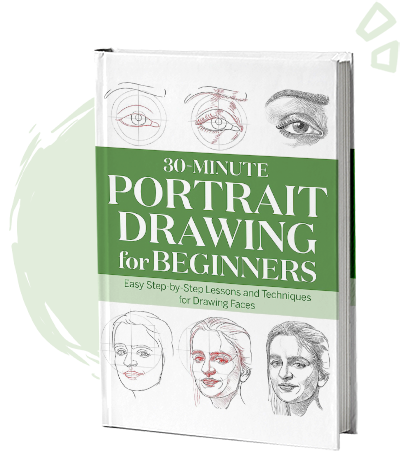
Each page guides you through short, at-home lessons on how to draw realistic faces. It has a lot of step-by-step guides, ideal for getting started in drawing.
From basic facial structures to finer details, the book teaches you the fundamentals of portraiture, and also allows you space to practise on the page.
To summarize
Drawing a portrait can be a complex task, but by breaking it down into steps and taking it one step at a time, we can draw more easily.
By carefully going through the drawing process step by step, we give ourselves time to think and observe. This naturally leads to better results.
The entire resemblance of a portrait lies in its structure and proportions. When we are able to balance our ratios more effectively, we automatically achieve a more accurate drawing. ✍️
Save the article for future reference!
By hovering over the image, you can directly save the article to your Pinterest account. This also allows us to share the article with a wider audience of aspiring artists!
Hi, Zephy… Thanks a lot for sharing the valuable drawing tutorials.
I love your step-by-step explanation.
However, since it is written in French, so I must use Google Translate to help me understand. 🙂
Do you have the complete drawing tutorial ebook in English?
Thanks.
Hey Tino, thank you for your sweet message ! ✨
The english version of the whole website is on its way, we’re actually working on it.
I’ll let you know when the guide is available too. Thanks !
To provide the best experiences, we use technologies such as cookies to store and/or access information on devices. Consenting to these technologies will allow us to process data such as browsing behavior or unique IDs on this site. Not consenting or withdrawing consent may have a negative impact on certain features and functions.
Functional
Always active
Storage or technical access is strictly necessary for the legitimate interest of enabling the use of a specific service explicitly requested by the subscriber or user, or for the sole purpose of transmitting a communication over an electronic communications network.
Preferences
The technical storage or access is necessary for the legitimate purpose of storing preferences that are not requested by the subscriber or user.
Statistics
The technical storage or access that is used exclusively for statistical purposes.Storage or technical access that is used exclusively for anonymous statistical purposes. In the absence of a subpoena, voluntary compliance by your Internet service provider, or additional records from a third party, the information stored or accessed for this sole purpose generally cannot be used to identify you.
Marketing
Storage or technical access is necessary to create user profiles for sending advertisements or to track the user on a website or across multiple websites with similar marketing purposes.


16 comments
Thank you very much for these valuable tips, I’m still struggling, but with practice, I can only improve!
You’re very welcome! It’s completely normal, it’s far from being easy, but progress will be visible quickly with a bit of practice.
Your method is really good
Thank you very much for sharing especially
Martine
Hello Martine, I’m very happy that you liked the article! A big thank you for this sweet message ☀️
Thank you for your advices
You’re welcome, it’s my pleasure. ✨
thank you for these valuable tips.
You’re very welcome, Françoise. Happy practicing! ☀️
Truly very interesting and enriching! 😊
These tips are helping me immensely. I’m delighted 😍😍
You’re very welcome! I’m thrilled it can be helpful ✨
Thank you very much, I was looking for references, and these clear explanations have been very helpful. I thank you immensely.
Delphine 😊
I’m delighted that it could help! It’s my pleasure, thank you for your kind message. ☀️
Hi, Zephy… Thanks a lot for sharing the valuable drawing tutorials.
I love your step-by-step explanation.
However, since it is written in French, so I must use Google Translate to help me understand. 🙂
Do you have the complete drawing tutorial ebook in English?
Thanks.
Hey Tino, thank you for your sweet message ! ✨
The english version of the whole website is on its way, we’re actually working on it.
I’ll let you know when the guide is available too. Thanks !
Thank you for all. You re really talented..you inspire me tonbe a greater artist and also inspire others
You’re so welcome, I’m really glad it could help ! ✏️